Tools Required
J 45012 Holding Fixture
- Place the rear housing in a vice.
- Heat the inner race of the roller bearing to 80°C (176°F).
- Move the synchromesh rings into reverse and 2nd gear positions.
- Install all shift forks except the 3rd/4th to their respective synchromesh rings, the 5th/reverse and the 1st/2nd, with their shafts.
- Assemble the main drive gear and counter gear to the mainshaft assembly, holding everything together as a single assembly.
- While the inner race is hot, install the mainshaft, counter gear and shift forks as an assembly into the rear housing.
- Inspect to ensure that all shift forks are seated in their bores.
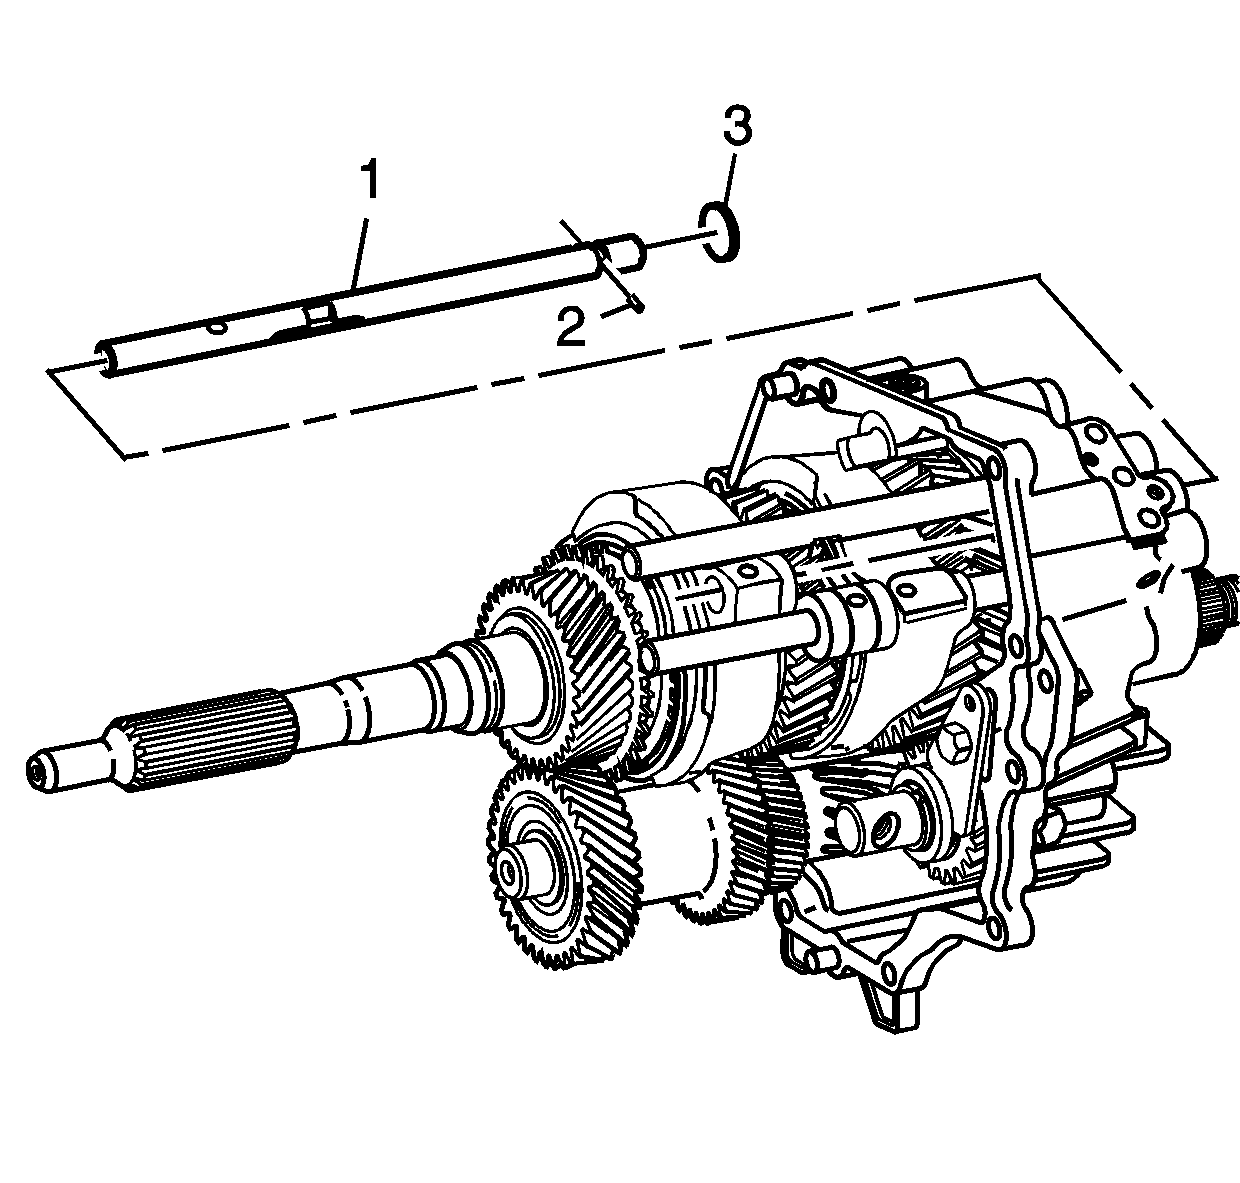
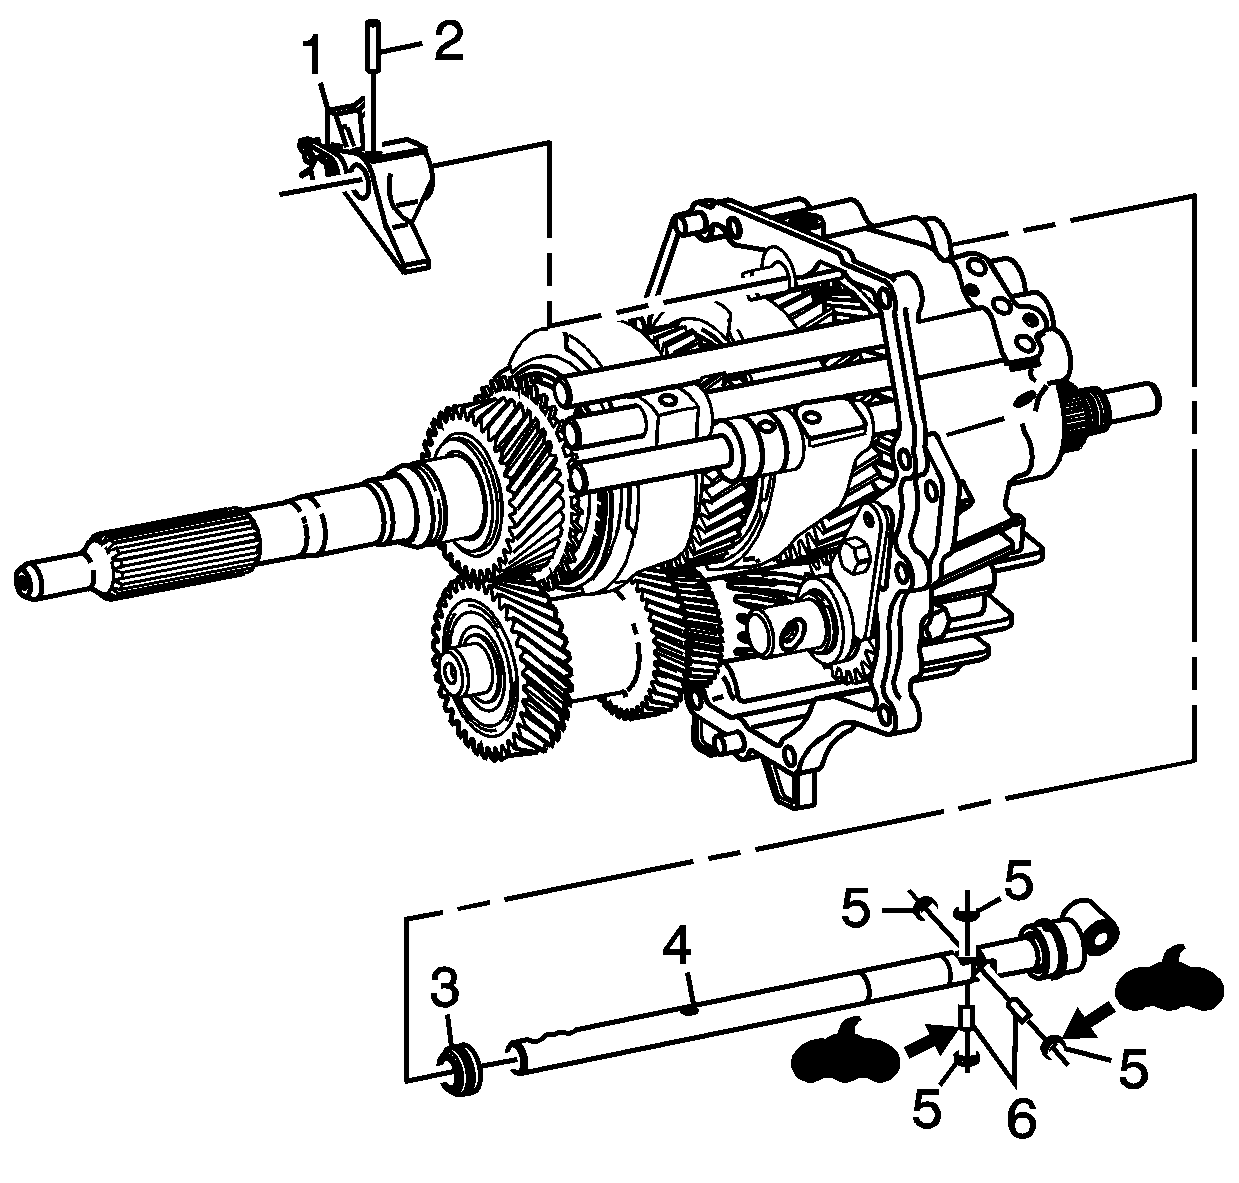
- Install the interlock pin (2) into the 3rd/4th shift shaft (1), then push the shift shaft trough the housing into the shift fork.
- Install plug (3) into the rear housing hole.
- Support the shift fork and install a new roll pin through the shift fork and shaft.
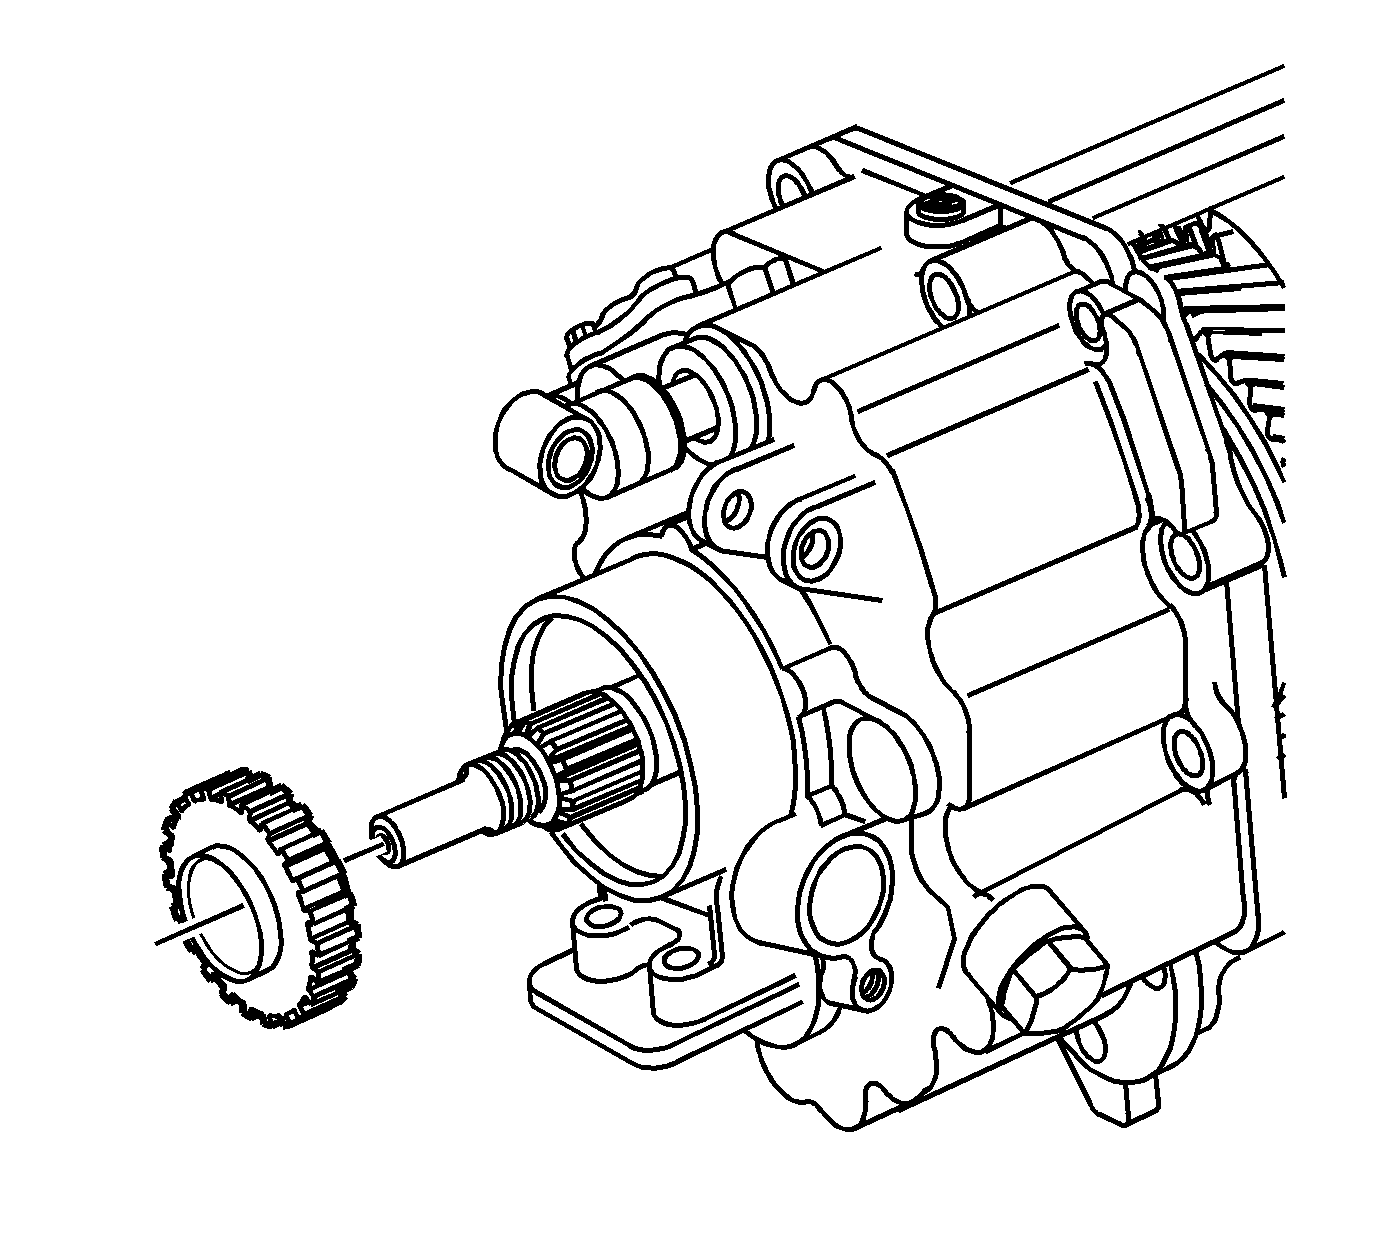
- Install the reluctor wheel to the rear case section.
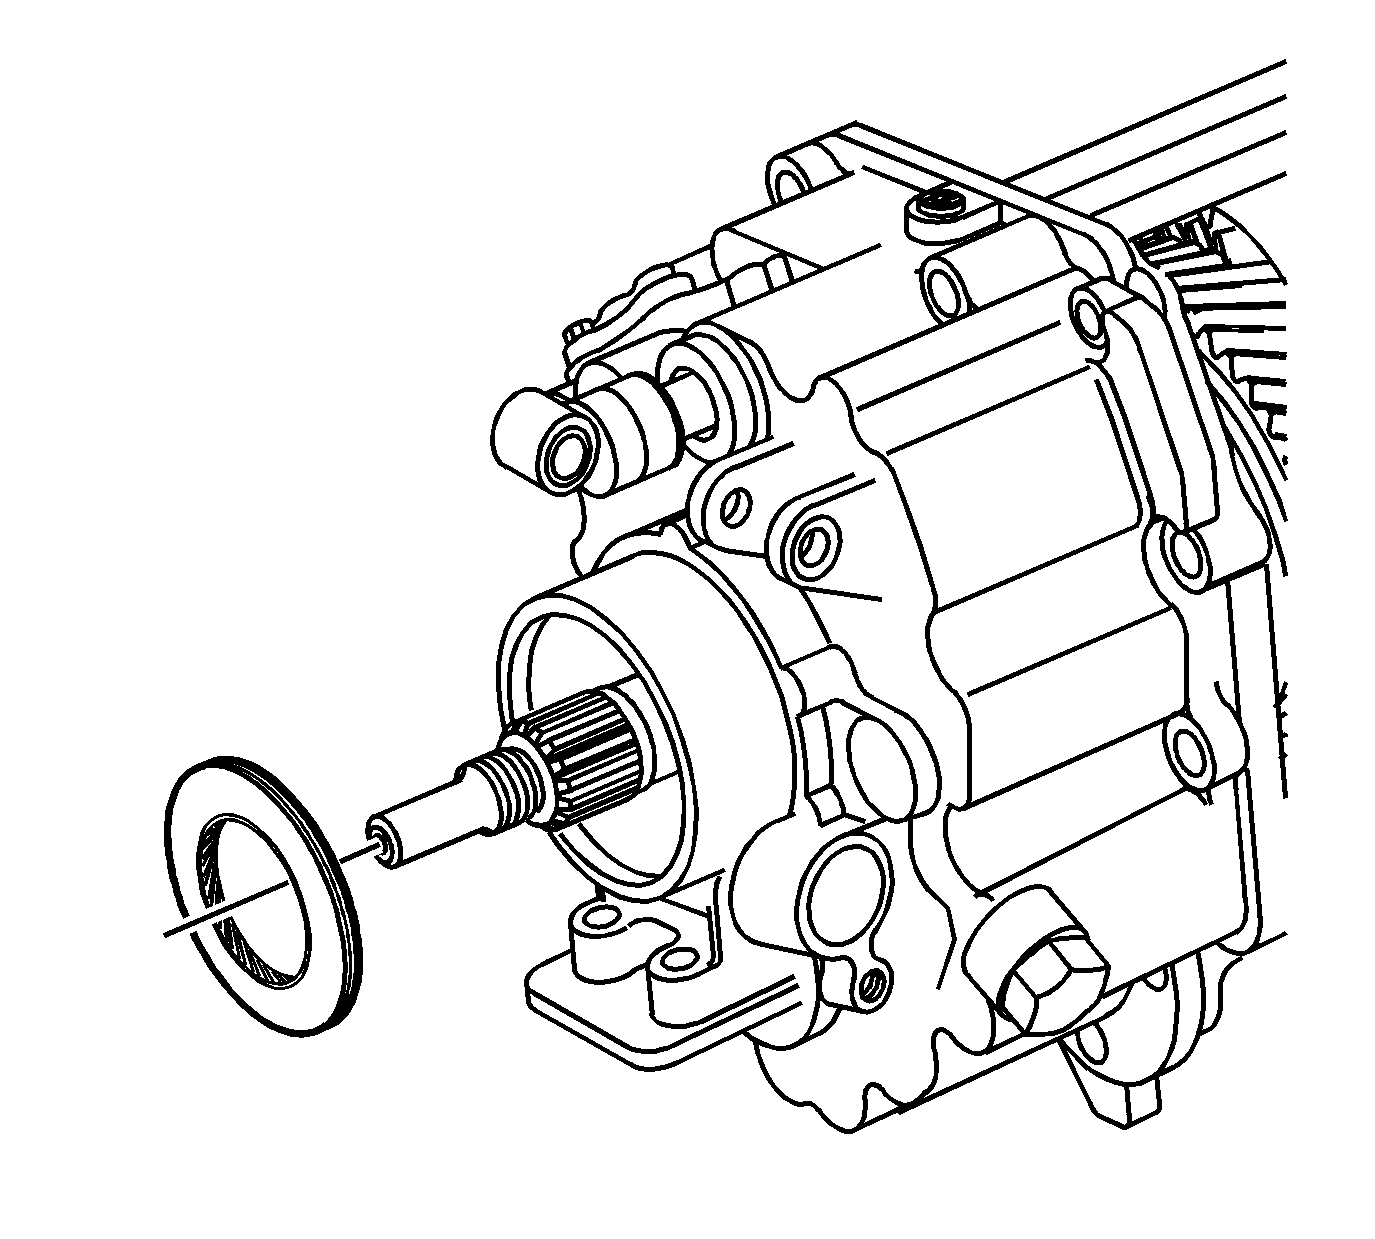
- Install the seal to the rear case section.
- Install the rear flange and nut.
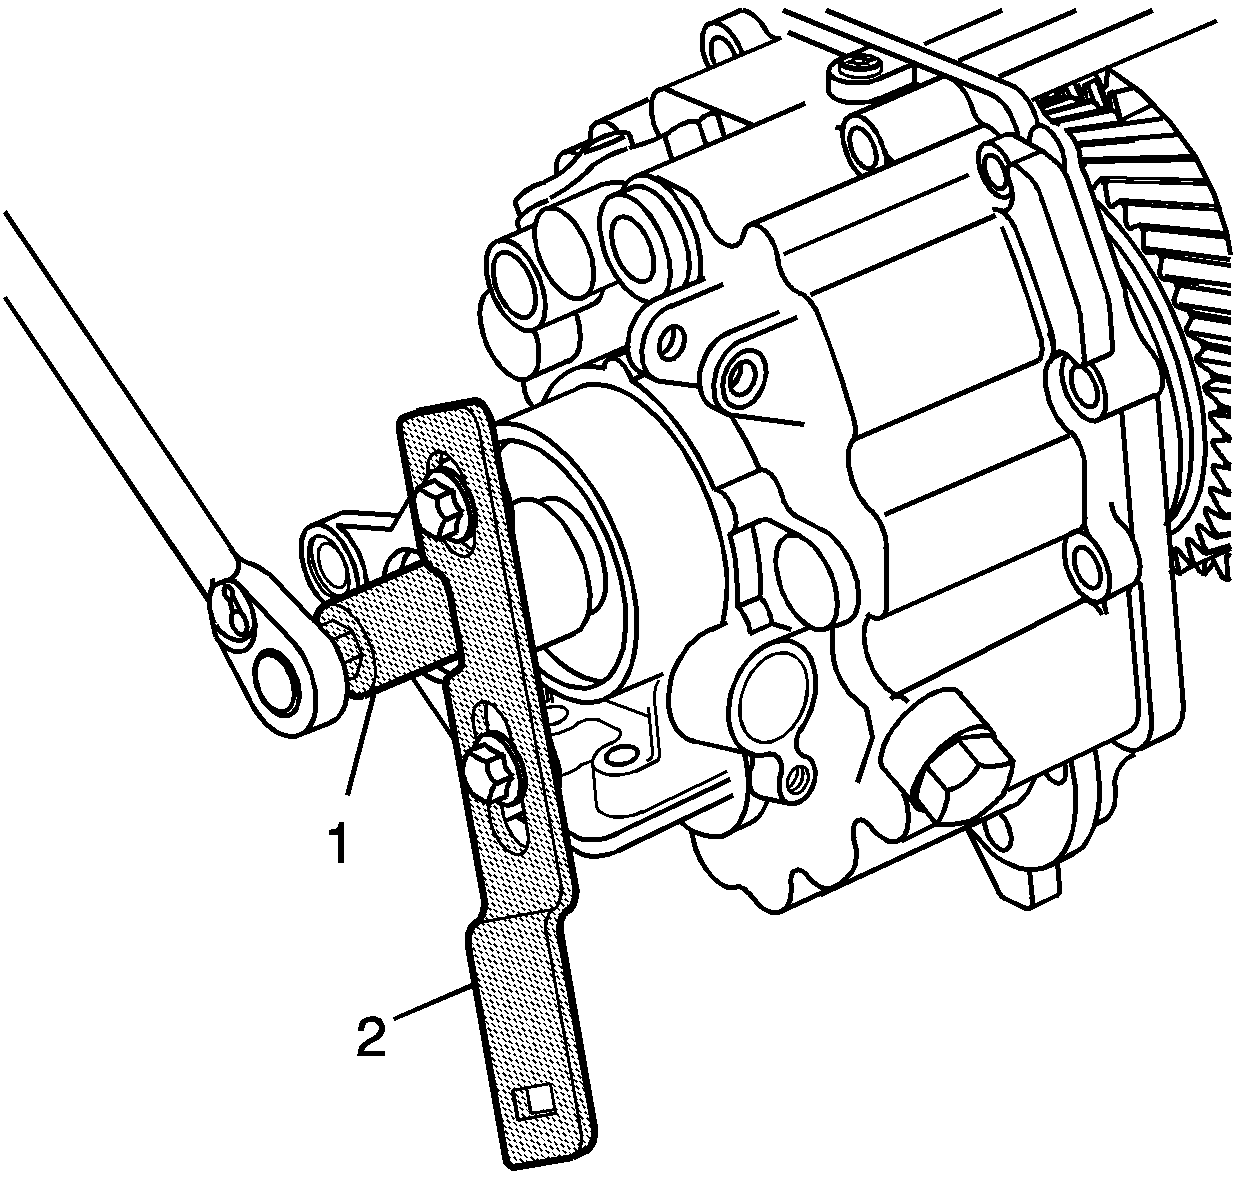
- Use J 45012 (2) to hold the rear flange while tightening the nut (1).
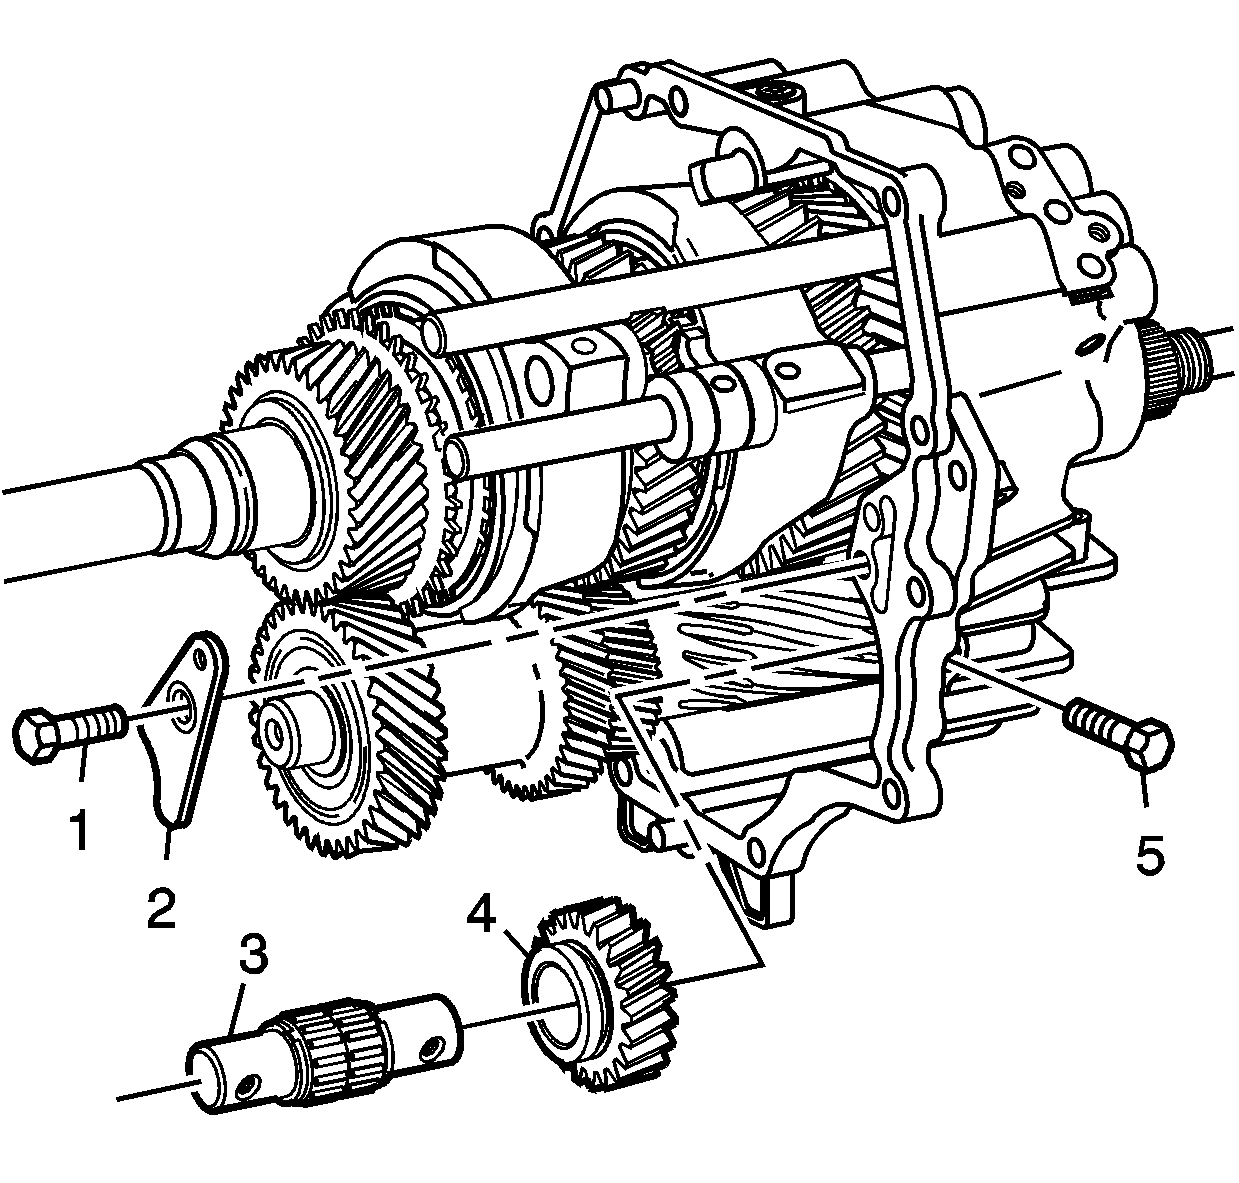
- Install the reverse idler gear (4) into the rear housing.
- Install the reverse idler shaft and bearings (3).
- Install the reverse idler shaft retaining bolt, and hand tighten.
- Align the thrust plate (2) with the groove on the reverse idler gear, and install the thrust plate retaining bolt (1).
- Apply a thin coating of petroleum jelly to the gearshift operating shaft pins (6) and rollers (5), and install onto the shift shaft (4).
- Install the shift shaft seal (3) into the rear housing.
- Install the shift shaft (4) through the hole in the rear housing, and slide into the gearshift selector arm (1).
- Align the roll pin hole in the selector arm (1) with the hole in the shift shaft (4) and install the roll pin (2).
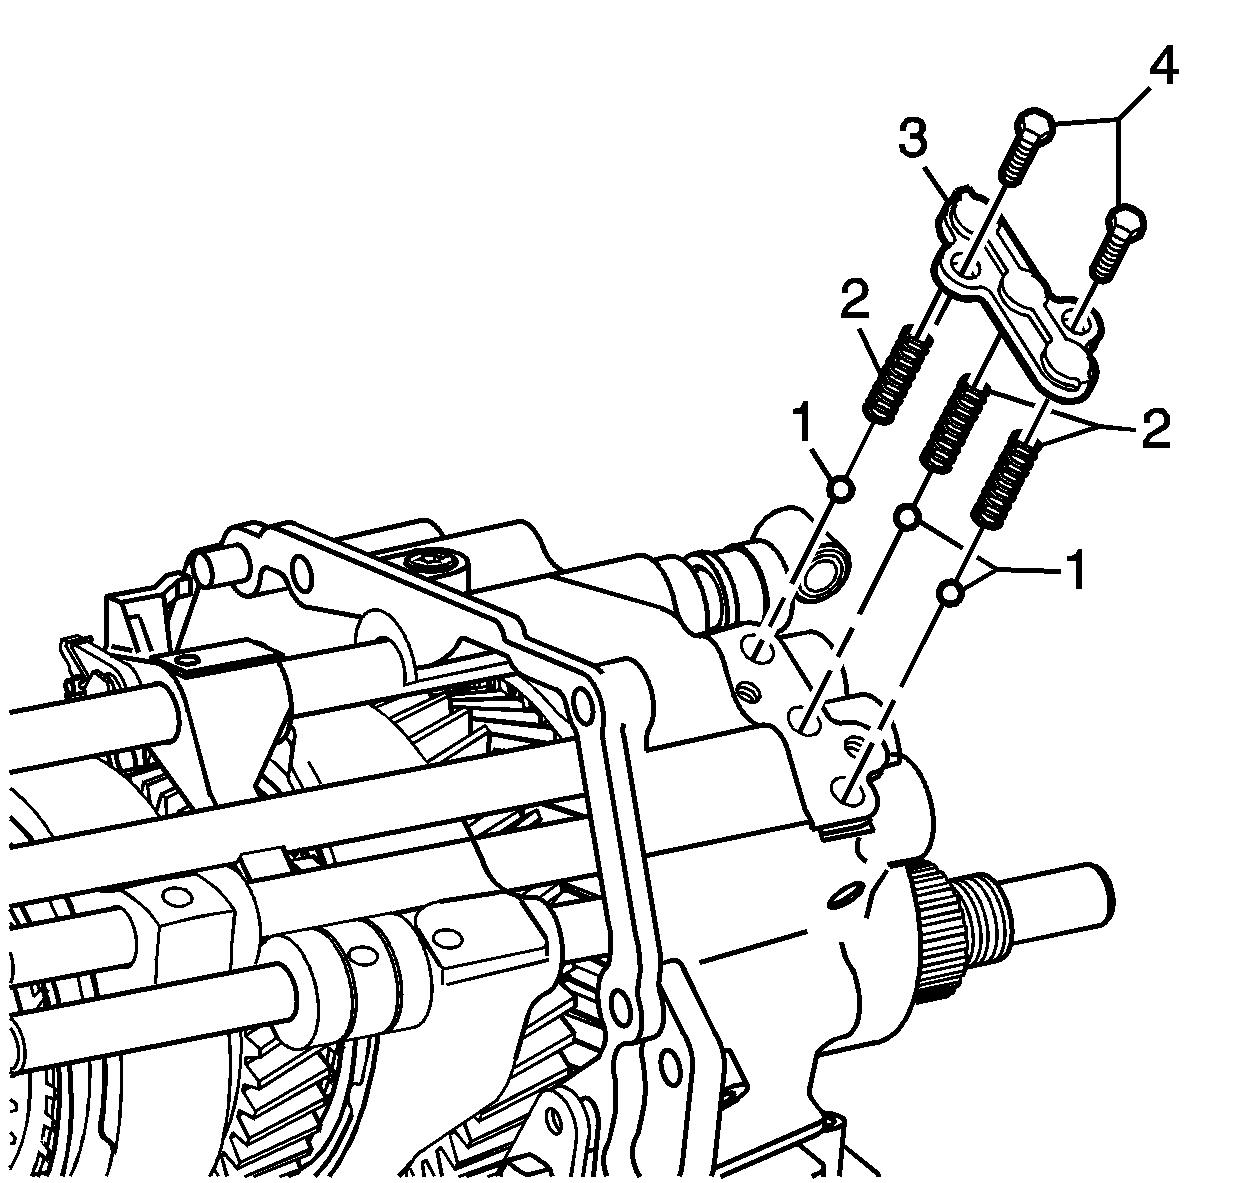
- Install the 3 detent balls (1) and springs (2) into the rear housing.
- Install cover (3) and bolts (4).
- Heat the inner race of the front case's ball bearing assembly to 80°C (176°F).
- Apply a bead of LOCTITE 574 sealant or equivalent to the rear housing sealing surface.
- Position the front housing onto the rear housing, aligning shift rods with the bores in the front housing.
- Install the long housing bolt (1) in the correct position as shown.
- Install the remaining housing bolts and tighten in a criss cross pattern.
- Install the spacer (2) and snap ring (1) onto the mainshaft.
- Install CSC assembly (2) and O-ring (3), with the 3 bolts (1) and bolt (5).
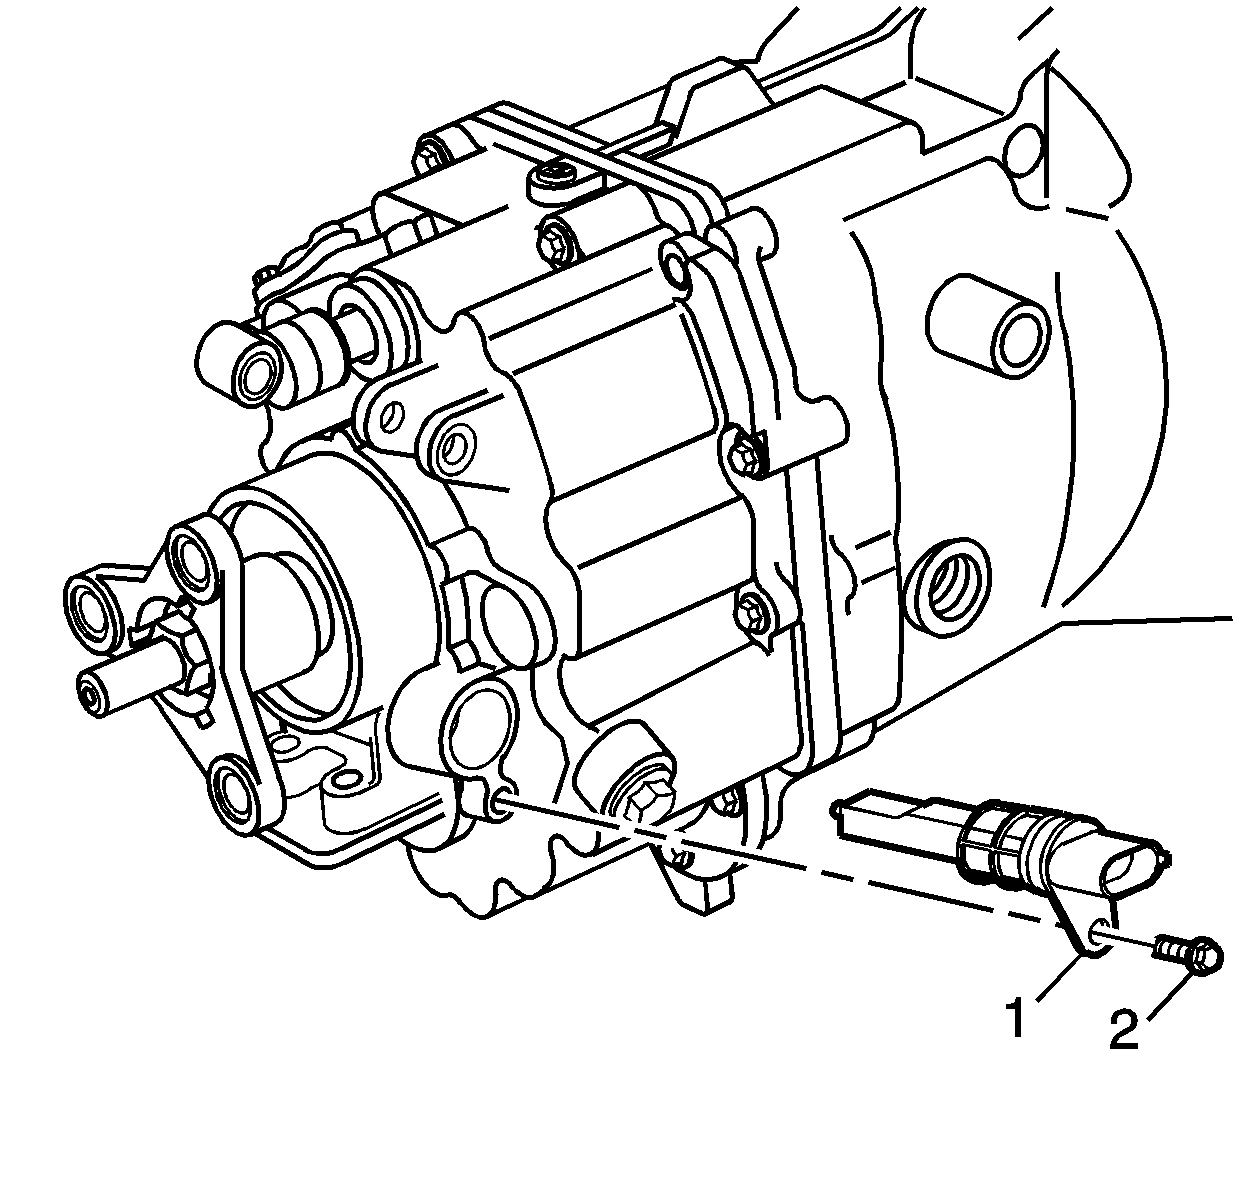
- Install the speed sensor (1) and bolt (2).
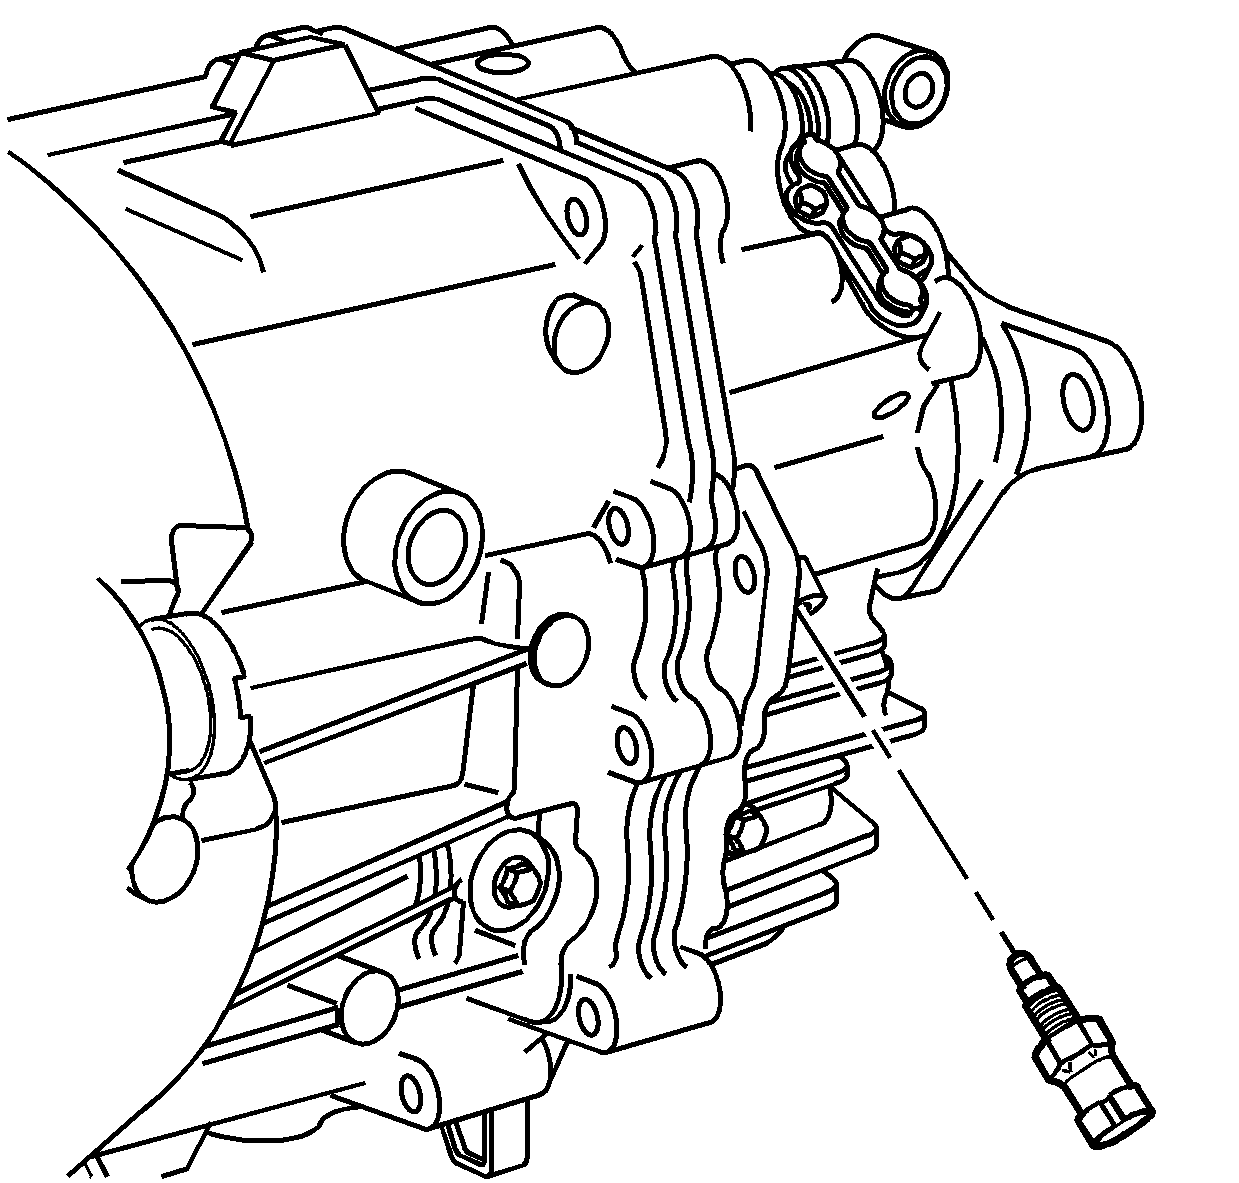
- Apply sealant GM P/N 12346004, (Canadian P/N 10953480), to the threads of the reverse switch.
- Install the reverse switch into the rear housing.
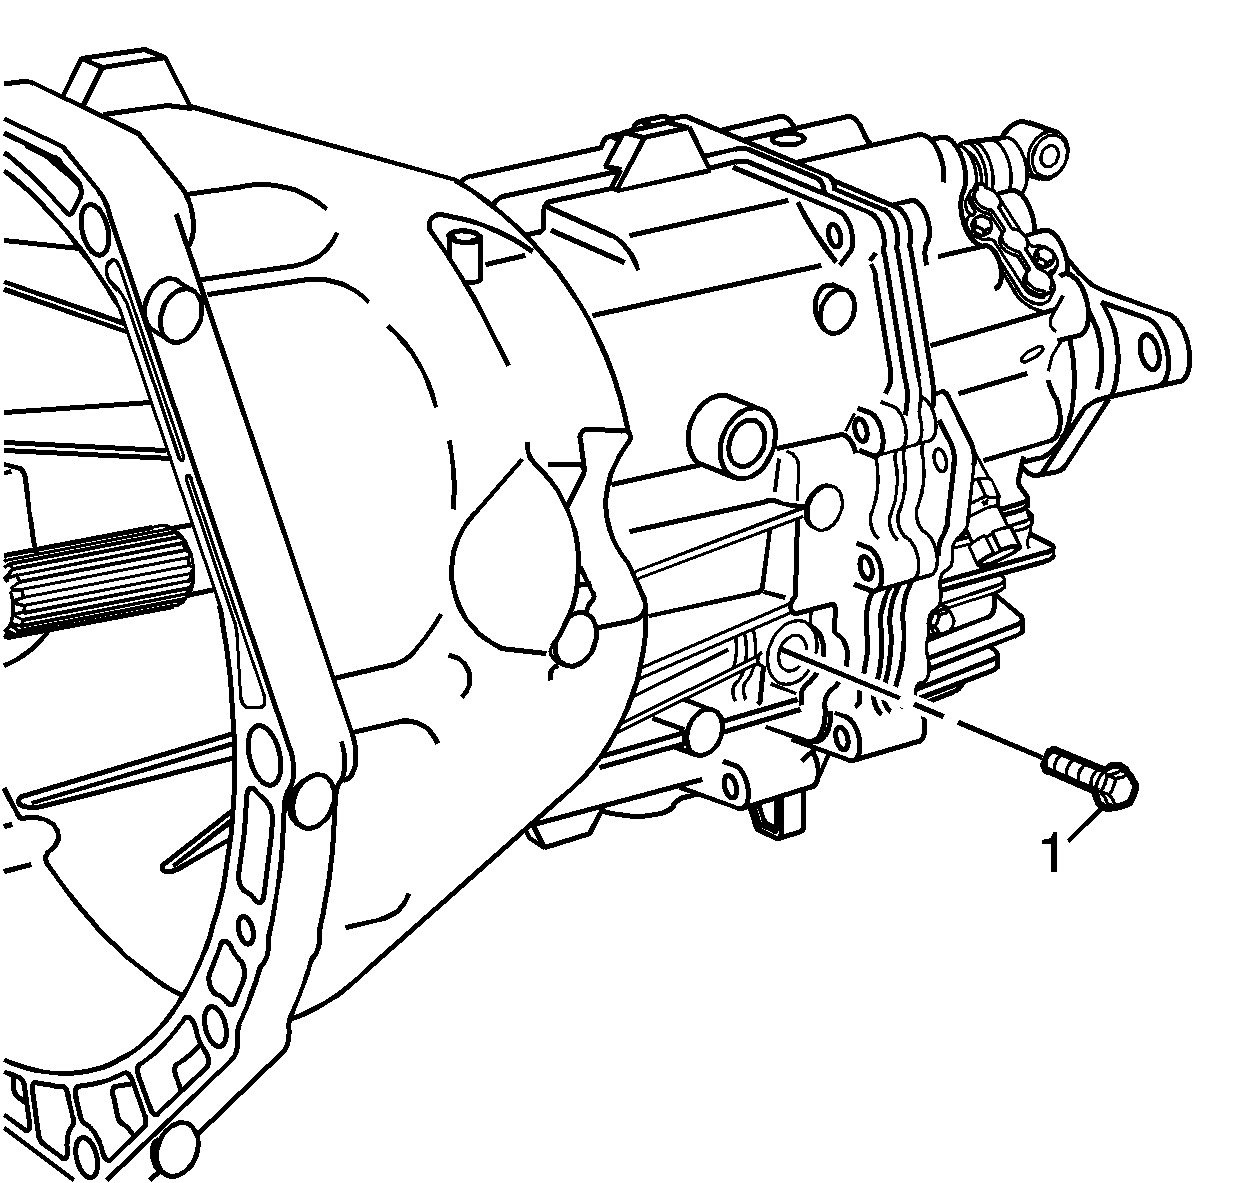
- Install the reverse idler bolt (1) into the front housing.
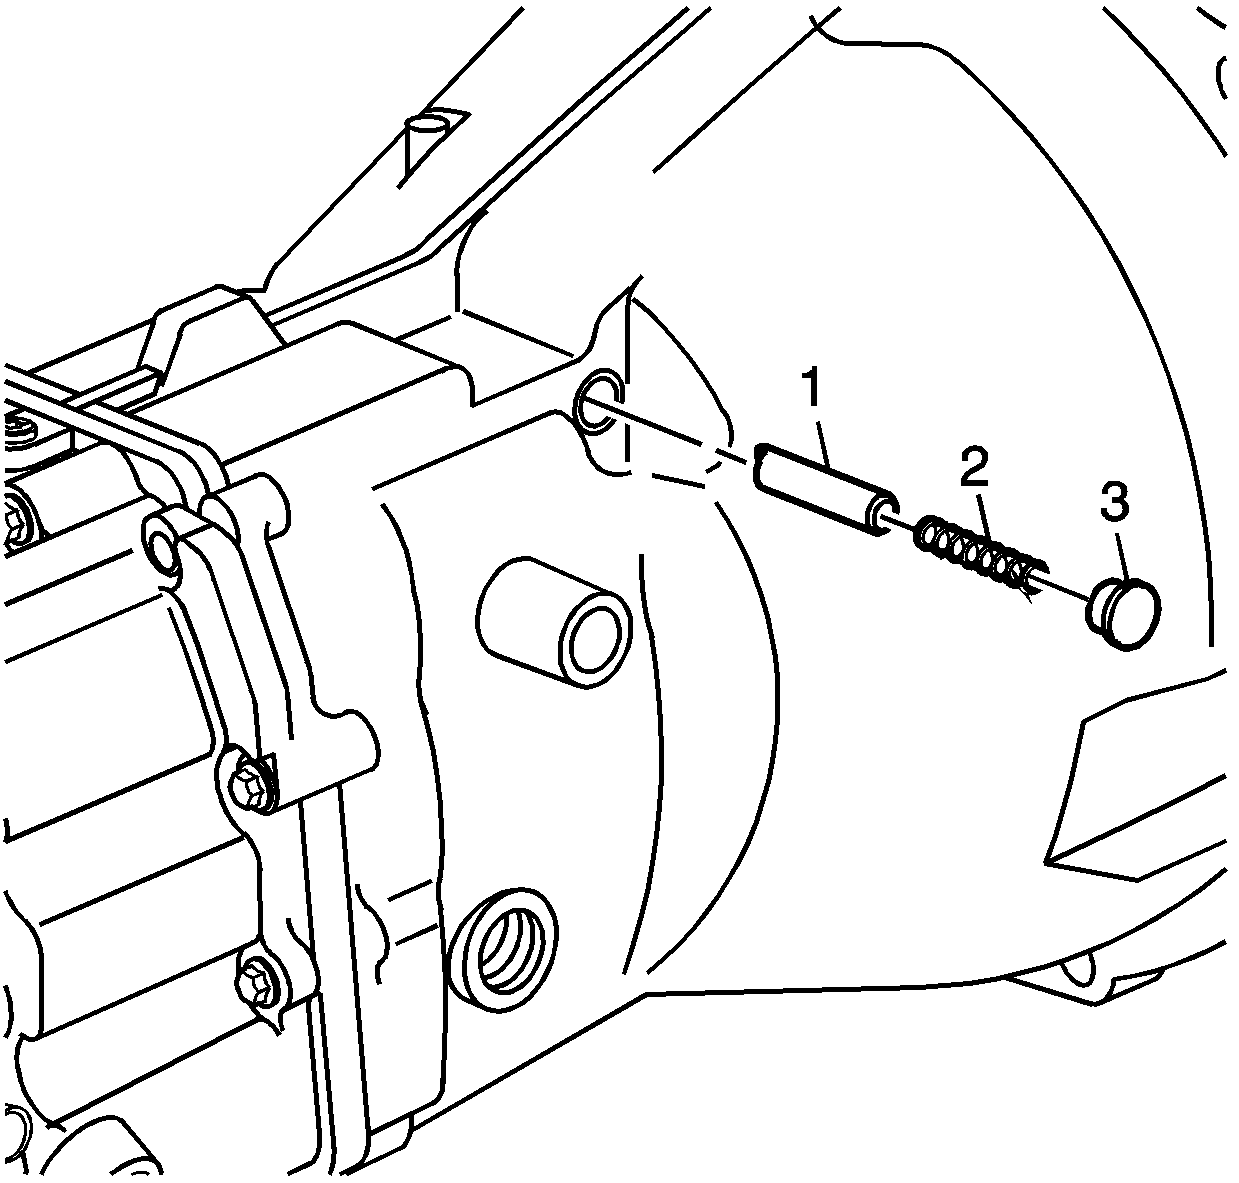
- Install the detent pin (1), spring (2) and plug (3) into the front housing.
- Apply pipe sealant GM P/N 1052080, (Canadian P/N 10953480), or equivalent to the drain plug threads.
- Install the drain plug.
- Fill the transmission with 3.27L (2.9 qt) of DEXRON III GM P/N 12346143, (Canadian P/N 10952622), after installation in the vehicle.
- Apply pipe sealant GM P/N 1052080, (Canadian P/N 10953480), or equivalent to the fill plug threads.
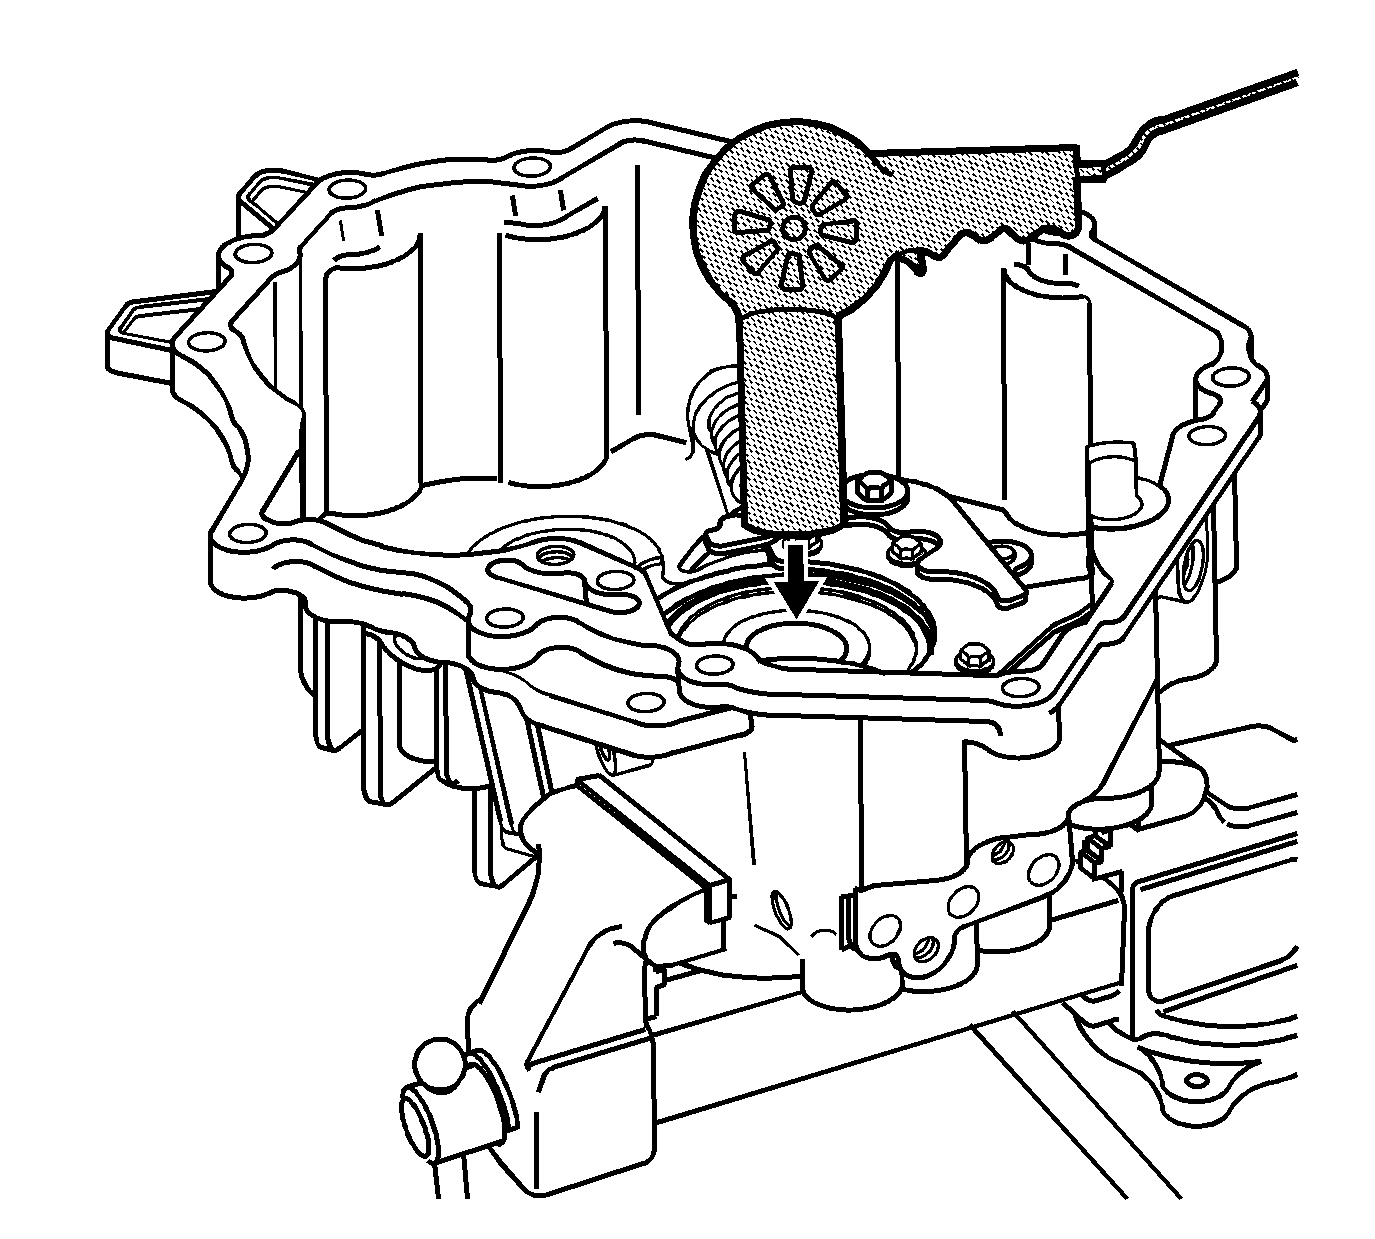
Notice: Do not heat the component over the specified value or damage could occur.
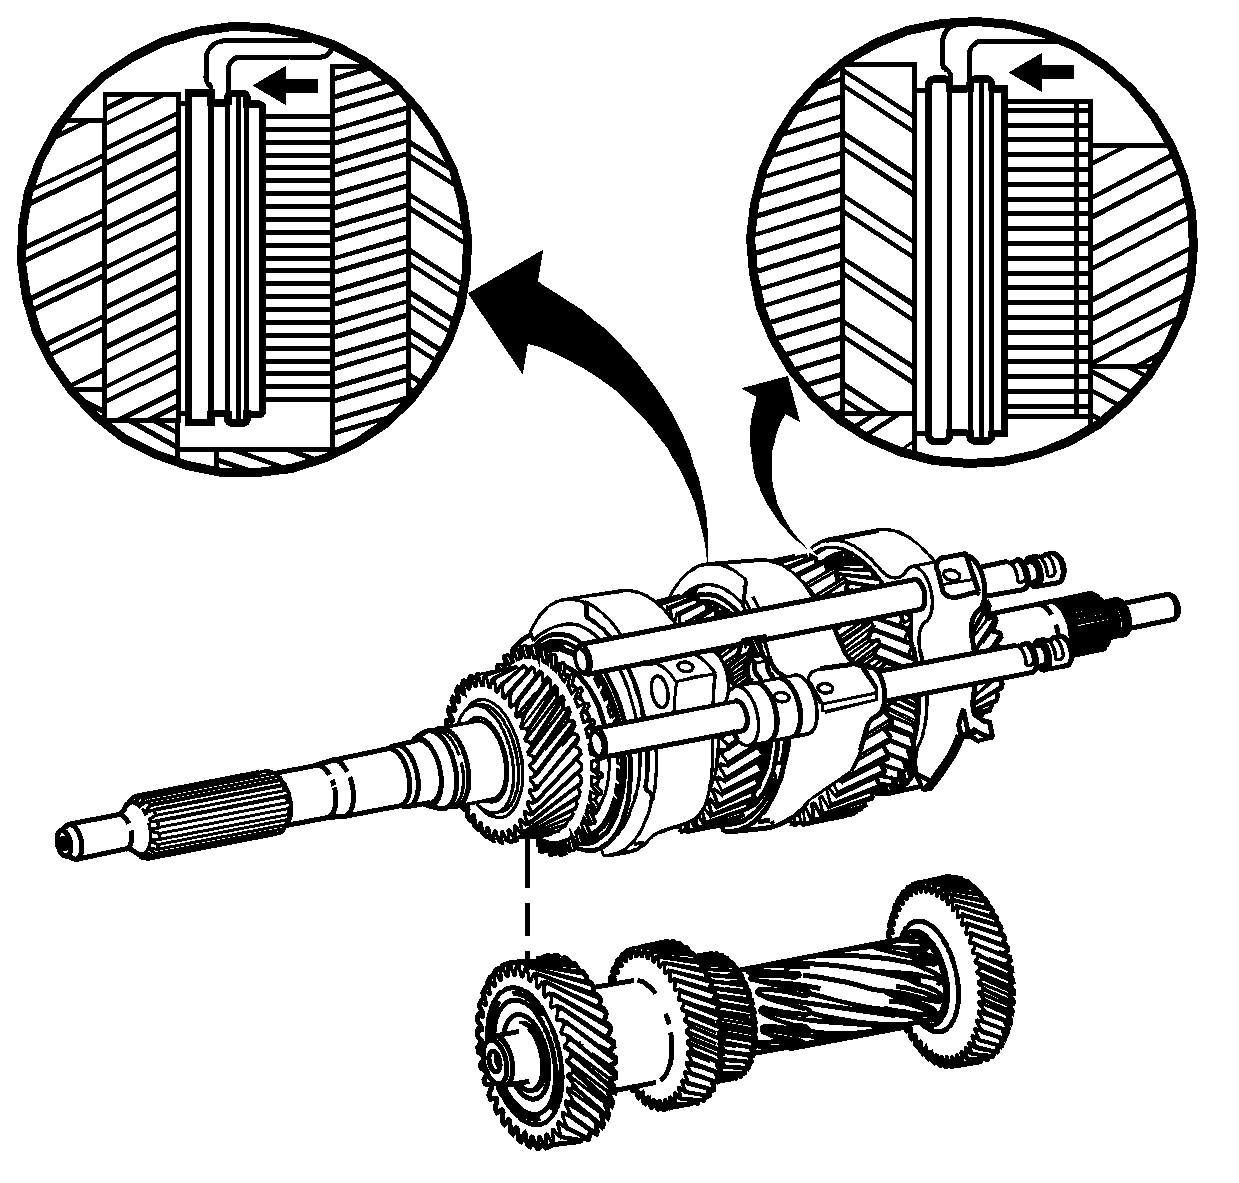
Important: The 3rd/4th shift shaft will be installed later in the assembly process.
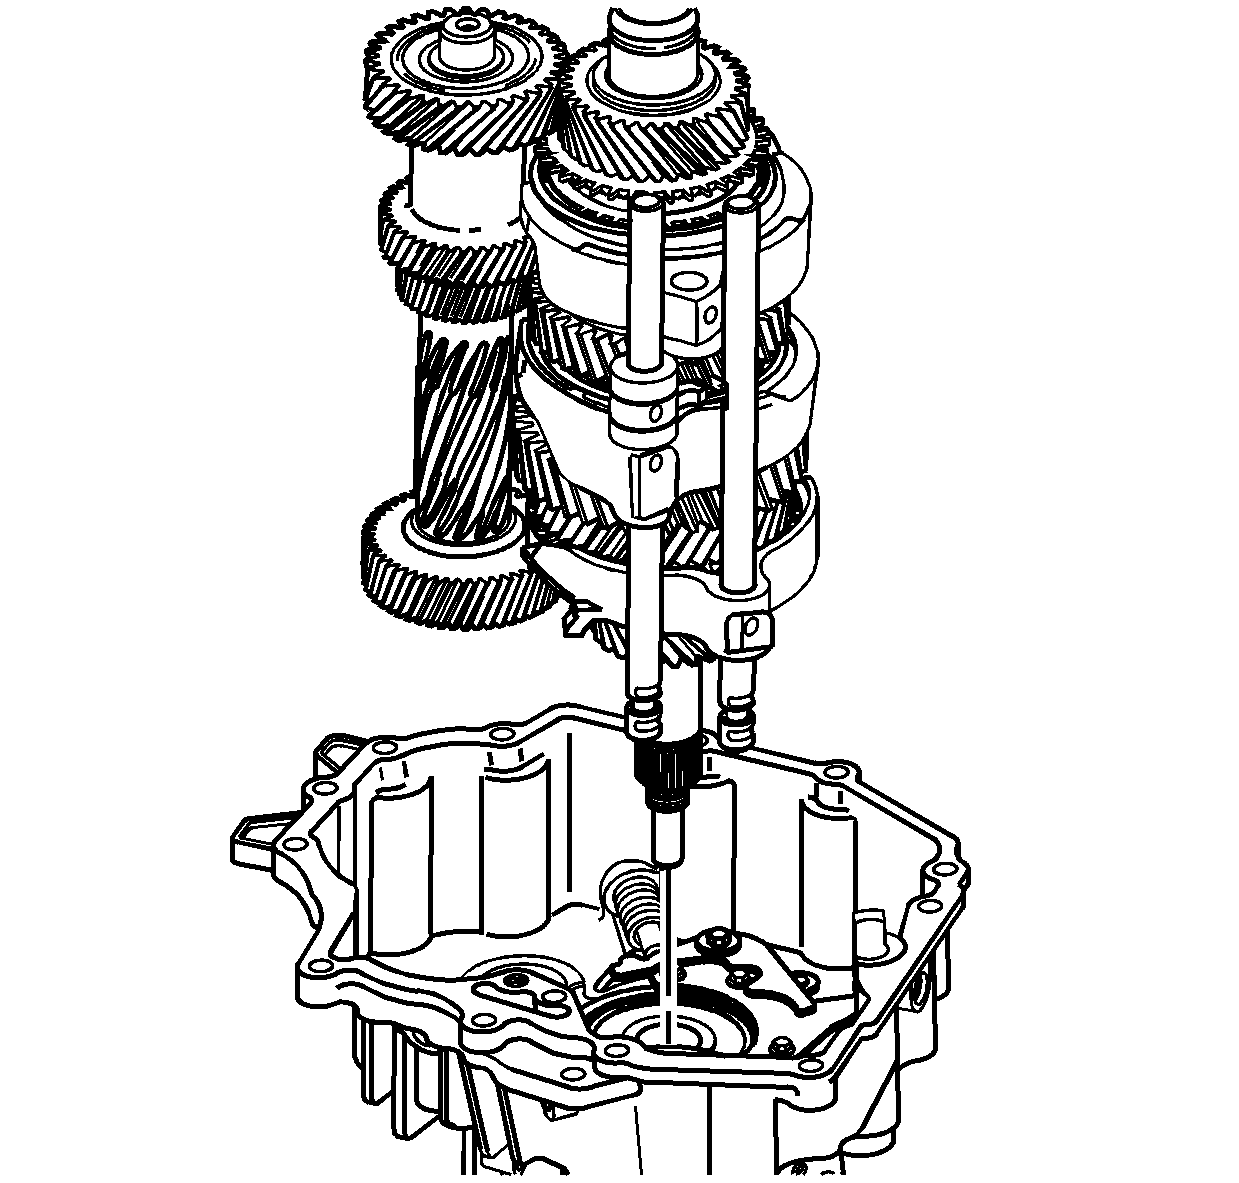
Notice: Refer to Fastener Notice in the Preface section.
Tighten
Torque the flange nut to 100 N·m (74 lb ft). This will seat the mainshaft into the bearing.
Tighten
Hold the reverse idler gear up to the thrust plate and tighten the retaining bolt to 25 N·m (18 lb ft).
Tighten
Tighten the cover bolts to 10 N·m (7 lb ft).
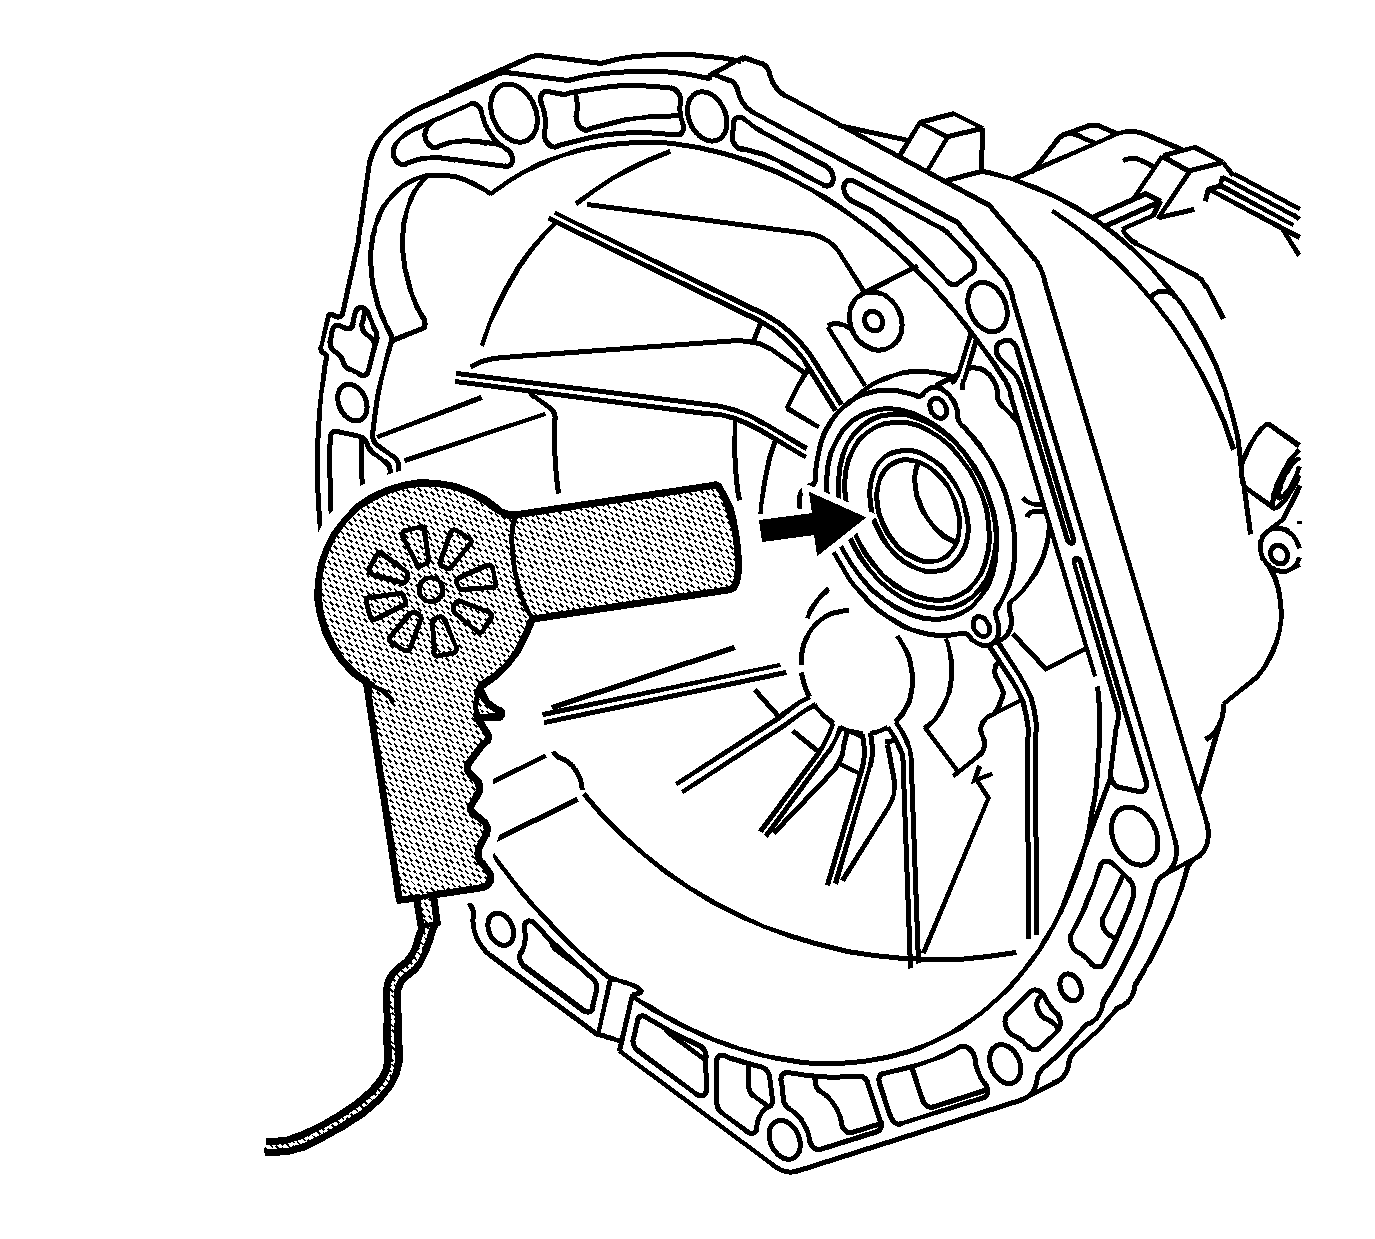
Notice: Do not heat the component over the specified value or damage could occur.
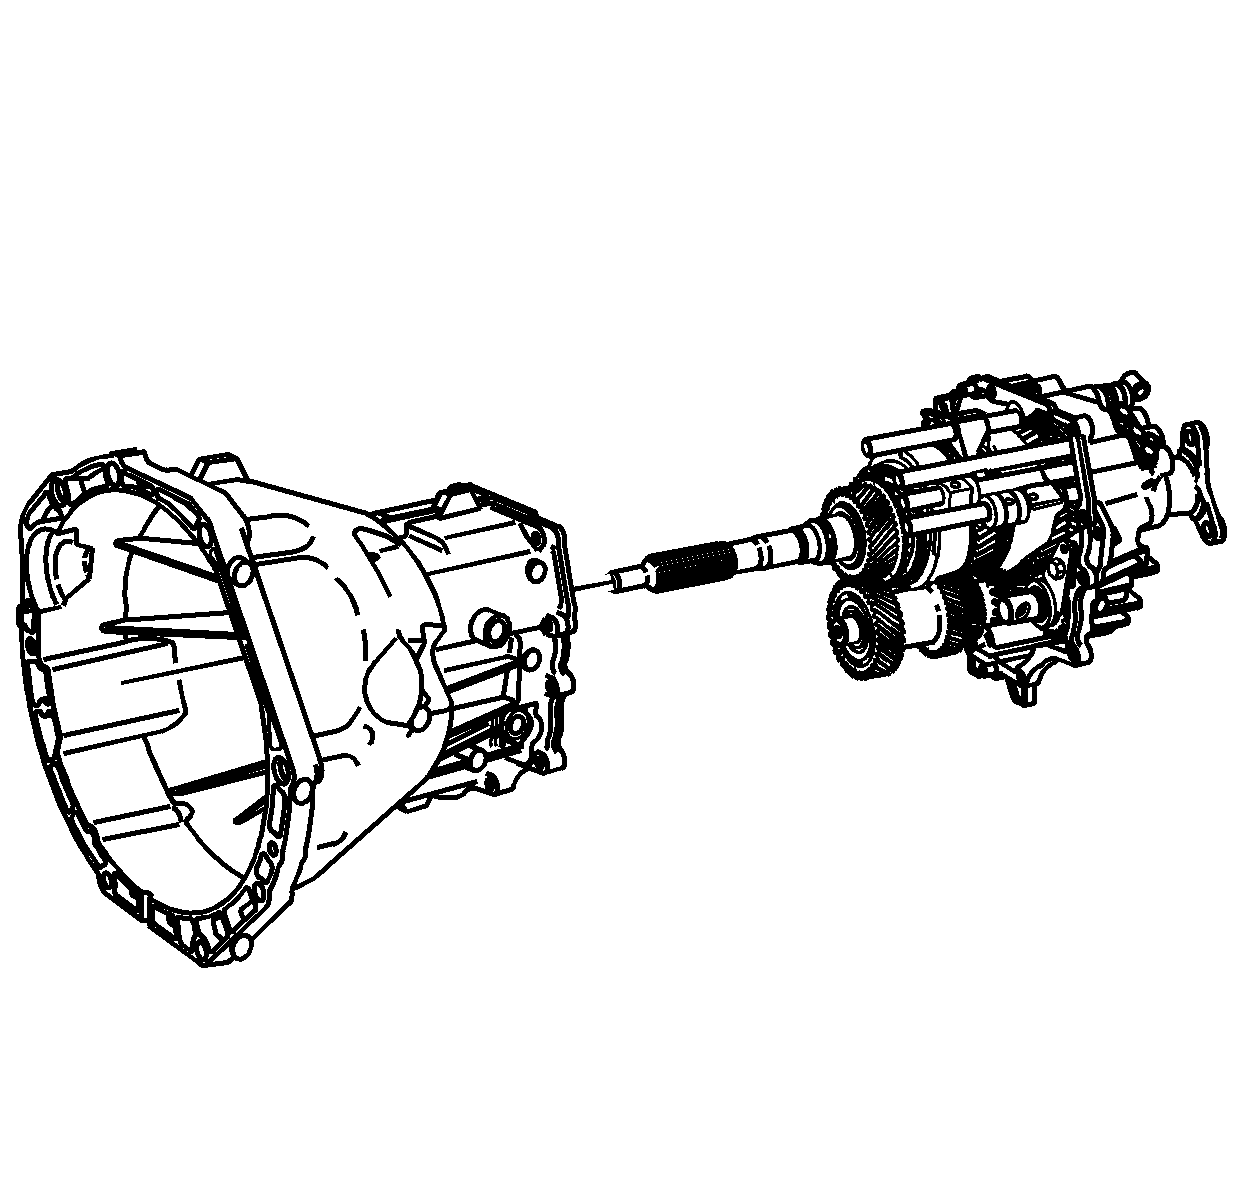
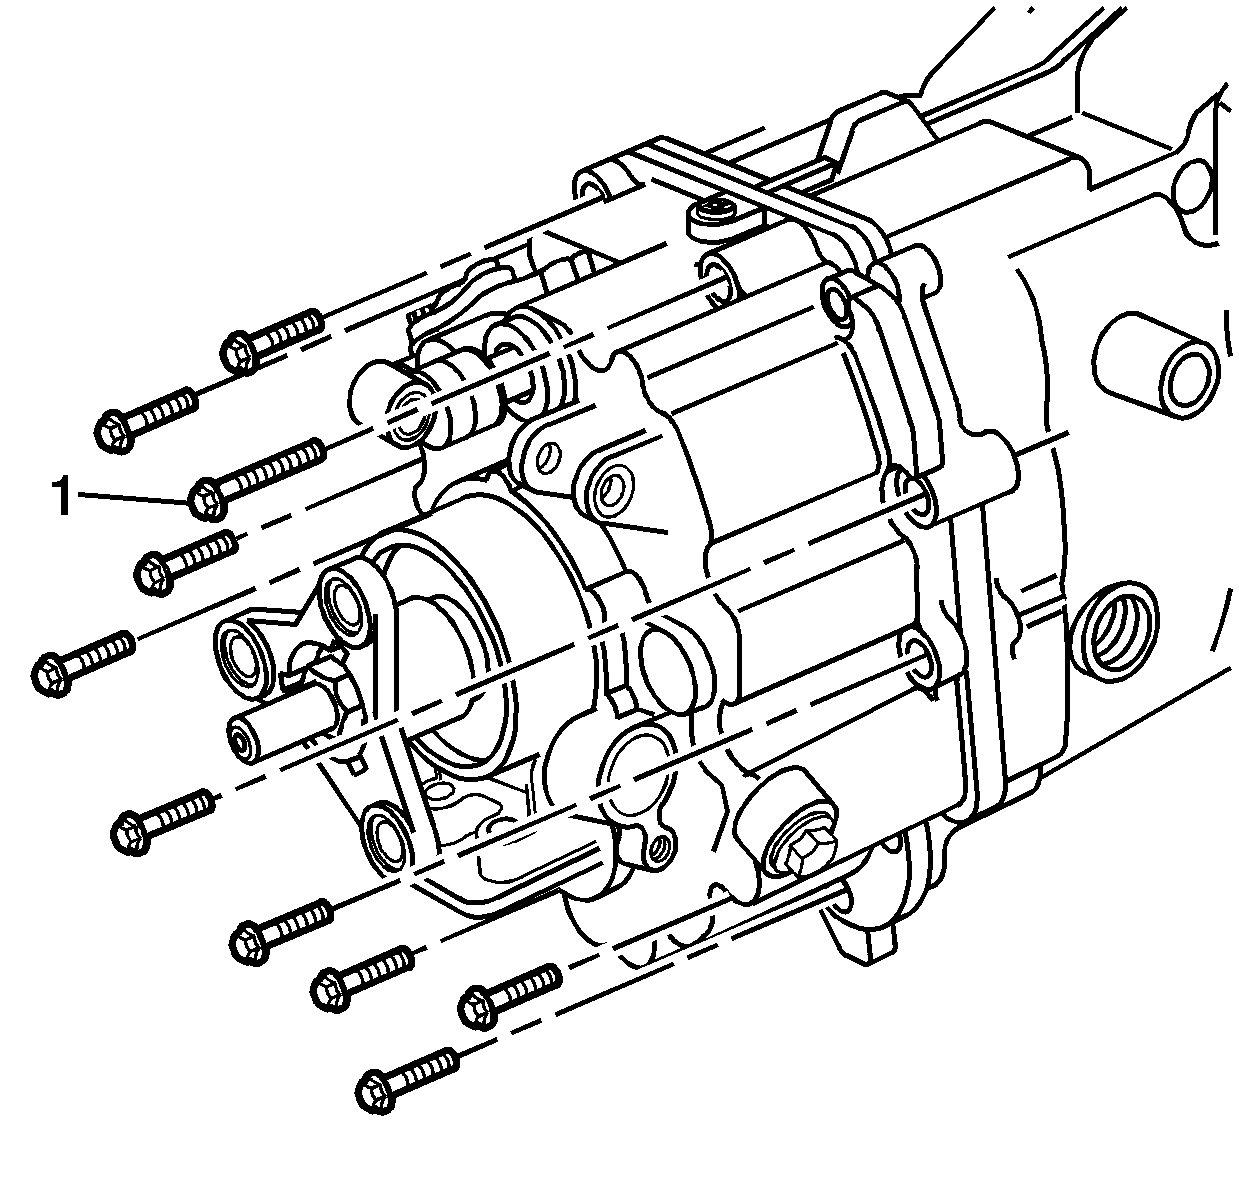
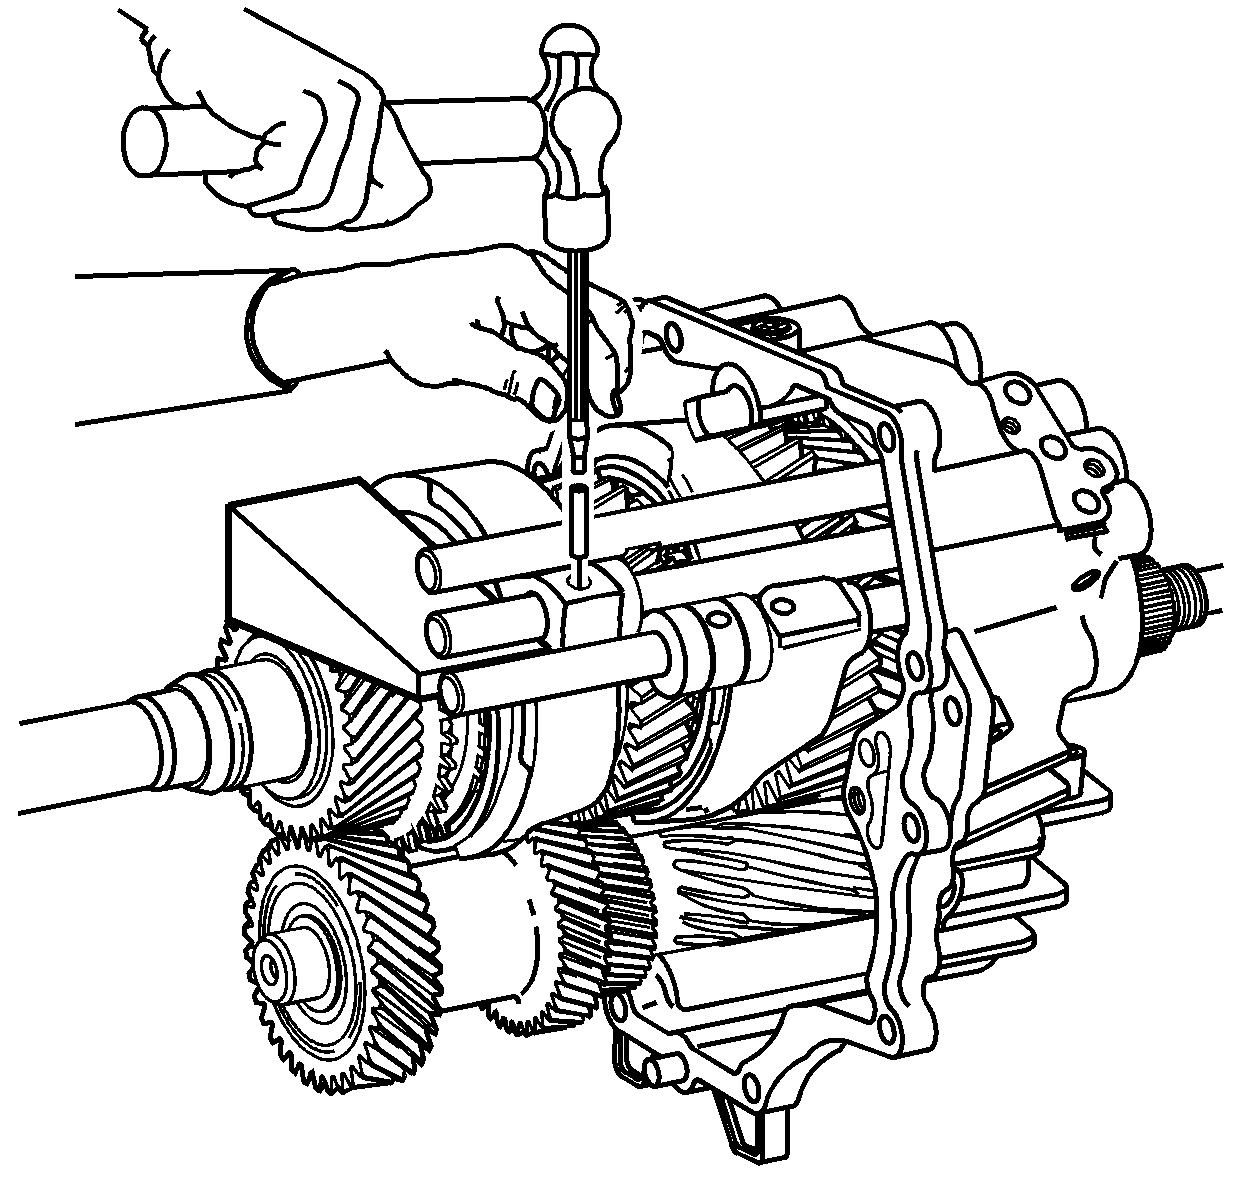
Important: While the front housing and the rear housing are together, have an assistant pull on the main shaft while tapping the inner race down with a hammer and punch to fully seat. Take care not to damage the bearing.
Tighten
Tighten all housing bolts to 25 N·m (18 lb ft).
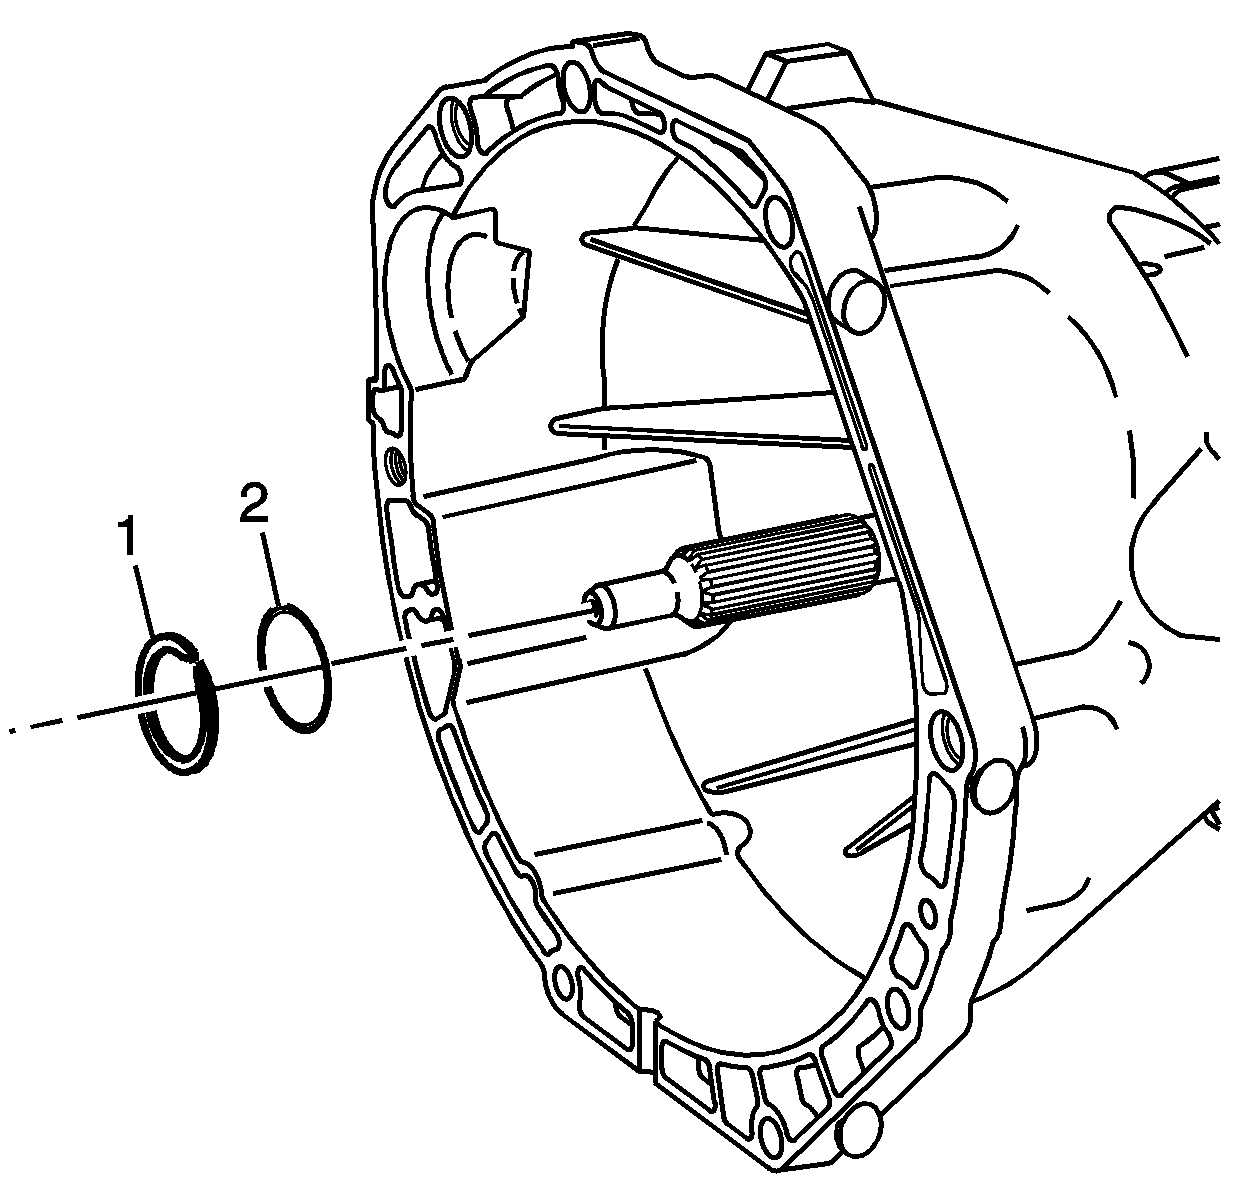
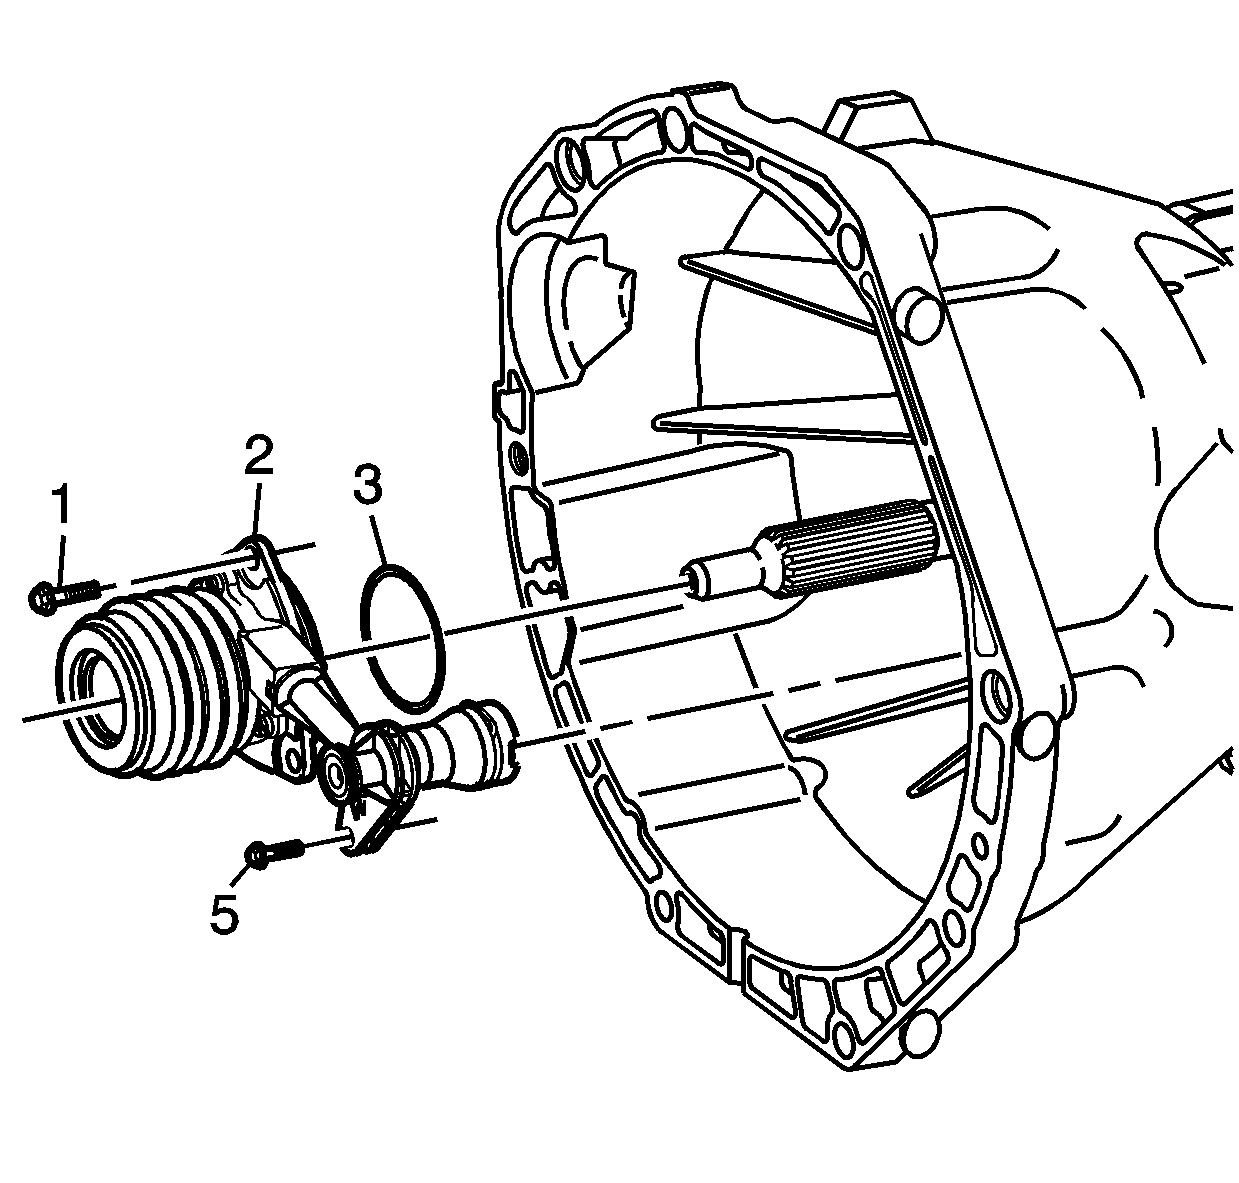
Tighten
Tighten the CSC assembly bolts (1) to 20 N·m (15 lb ft) and bolt (5) to 10 N·m (7 lb ft).
Tighten
Tighten the speed sensor bolt to 10 N·m (7 lb ft).
Tighten
Tighten the reverse switch to 18 N·m (13 lb ft).
Tighten
Tighten the reverse idler bolts to 25 N·m (18 lb ft).
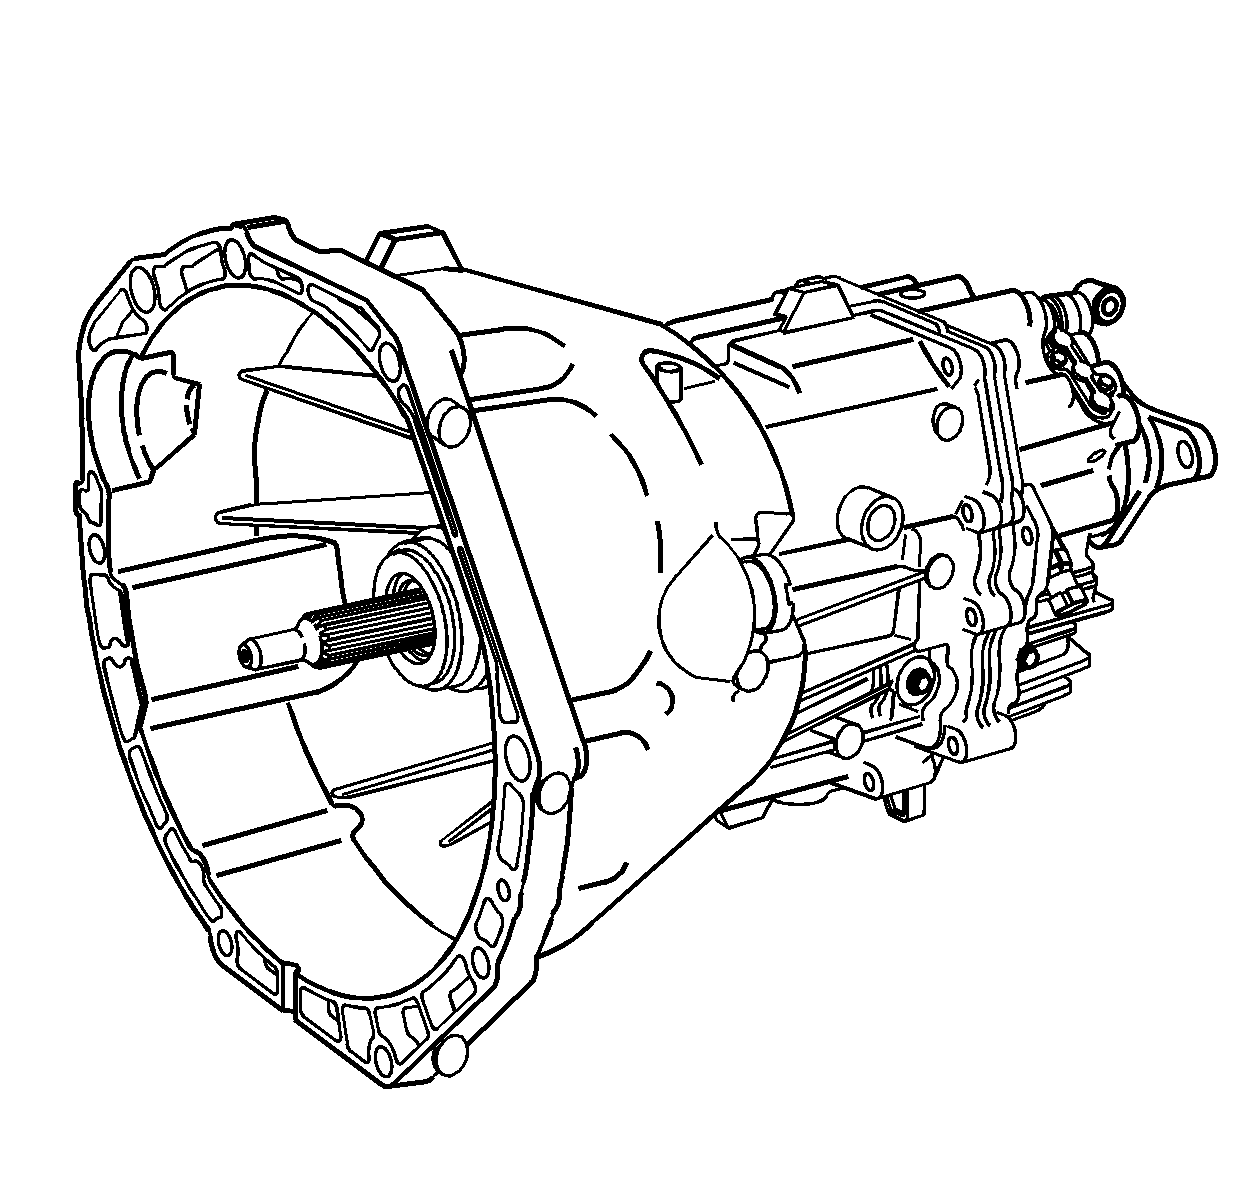
Tighten
Tighten the drain plug to 35 N·m (26 lb ft).
Install the drain plug.
Tighten
Tighten the fill plug to 35 N·m (26 lb ft).