
| Subject: | J 44551 A/C Suction Screen Kit Repair Recommendations
and Procedures After Catastrophic Compressor Failures |
| Models: | 1997-2004 Passenger Cars and Light Duty Trucks |
| with Delphi HD6, HU6 and HT6 Compressors |
This bulletin is being revised to update model years and add the HUMMER H2.
Please discard Corporate Bulletin Number 01-01-39-003 (Section 01 - HVAC).
GM Service Operations and Delphi Thermal Systems have worked with GM dealers
over the past three years to develop the tools and procedures to increase your success
rate on repairing vehicle A/C systems that experience catastrophic compressor failures.
After a catastrophic compressor failure, it is extremely important to eliminate
and/or contain the debris that causes repeat repairs. The debris generated from a
catastrophic compressor failure is discharged into the compressor suction line, the
discharge line, the condenser and the liquid line. The use of the J 44551
Suction Screen Kit DOES NOT replace the need for liquid line filters as described
in the vehicle specific Service Manual. Liquid line filters should be used whenever
possible (after a catastrophic compressor failure) to protect the expansion device
(orifice tube or TXV) from debris.
Analysis of failed replacement compressors show the debris discharged into the
INLET side of the compressor (suction line) is often pulled into the replacement
compressor. It is important to keep this debris out of the new compressor to avoid
repeat compressor failure. The J 44551 Suction Screen Kit is designed to help
protect the NEW (replacement) compressor from ingesting debris that was sent into
the SUCTION side of the system during a compressor failure.
The J 44551 kit supplies your dealership with the right tools and supplies
to cover the Delphi HD6, HU6 and HT6 compressors for most GM applications. Delphi
V5 and V7 compressors already have this screen installed in the suction port of the
compressor and do not need an additional screen installed.
Service Procedure
Tools Required
J 44551 Suction Screen Kit
The J 44551 Suction Screen Kit contains three different screen sizes.
It is important to select the correct size screen that will press fit into the suction
port of the compressor hose assembly. The screen should not be installed loose inside
the hose assembly.
Installation Procedure
- Evacuate the air conditioning system completely using the applicable
recovery equipment.
- Remove the bolt that attaches the manifold of the muffler assembly hose
to the air conditioning compressor.
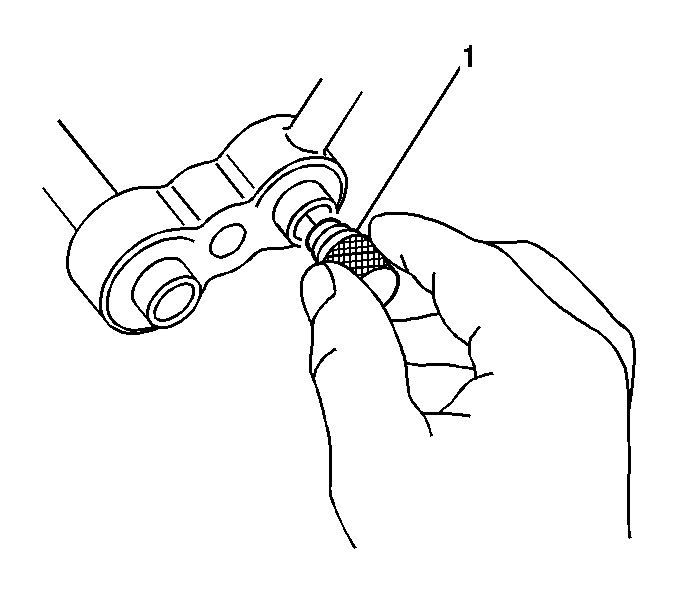
- Use the Suction Port Sizing Tool (1) in order to determine
the appropriate size filter screen.
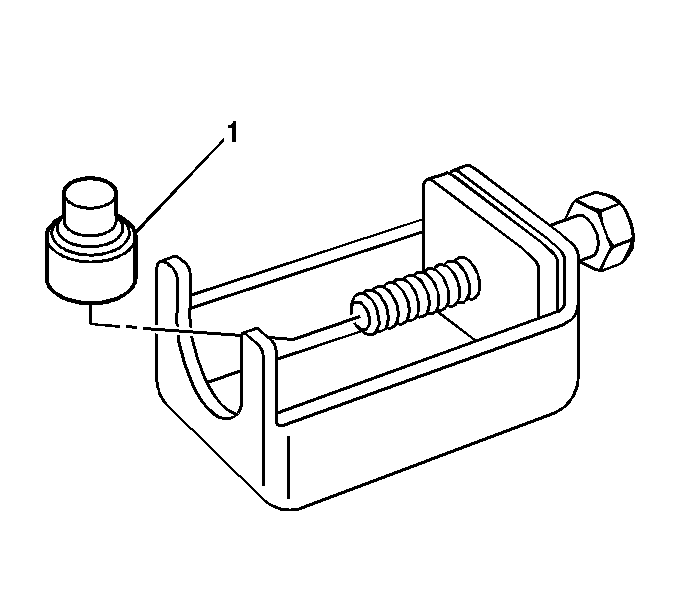
- Install the proper Installation Mandrel (1) on the
threaded portion of the Installation Tool.
- Using the Installation Tool, place the manifold into the fixture of the
tool.
| 5.1. | Lubricate the applicable filter screen with refrigerant lubricant. |
| 5.2. | Ensure that you are on the suction side of the air conditioning manifold. |
| 5.3. | Place the filter screen straight into the bore before proceeding. |
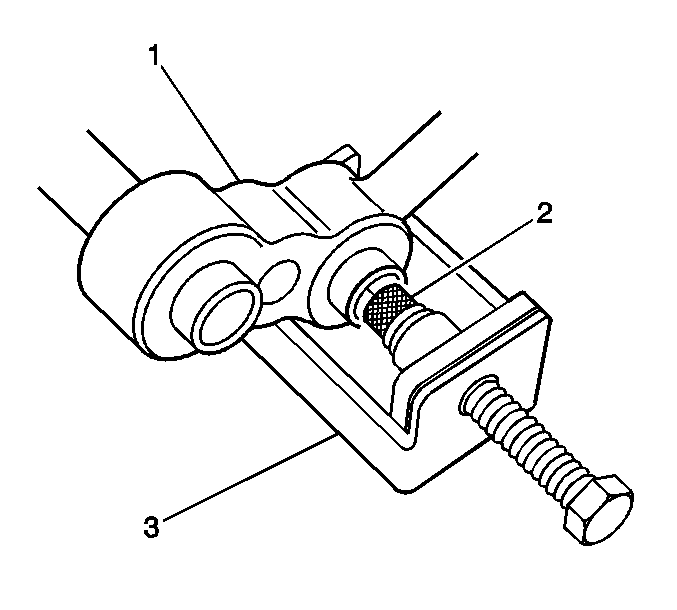
| 5.4. | Using a 9/16 in wrench, turn the bolt of the
Installation Tool (3) clockwise, pressing the filter screen (2) into the bore. |
The filter screen must be flush with or slightly below the bore.
- Reinstall the manifold (1) on the rear of the air conditioning compressor.
Make sure to tighten to the correct specifications.
Important: Be sure to clean the appropriate surface
before applying the Notification Label.
- Included in the kit is a bright yellow Notification Label with the following
message: ATTENTION! Suction Line Screen Installed. It is very important that you
apply this label to the manifold, the suction line, or some other appropriate, highly
visible location.
Removal Procedure
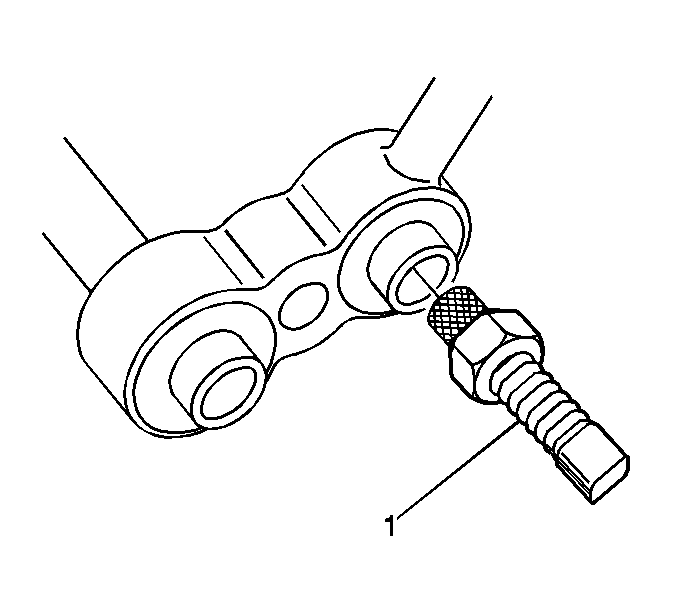
- Using the appropriate Removal Tool (1), place the
Removal Tool (1) into the bore of the filter screen.
- Turn the Removal Tool one turn clockwise, or until tight.
- Turn the nut clockwise to remove the filter screen using the appropriate
size wrench.
| • | 11/16 in wrench for size A filter screen |
| • | 3/4 in wrench for size B filter screen |
| • | 7/8 in wrench for size C filter screen |